The foundation of any good bread is properly activated yeast. Begin by combining the warm water, sugar, and yeast in a small bowl. Stir gently to dissolve the sugar and let it sit for 5-10 minutes. You’ll know the yeast is ready when it becomes frothy and bubbly, indicating that it’s alive and active.
Tip: If your yeast doesn’t froth, discard it and start over. Using inactive yeast will result in dense bread.
Step 2: Infuse the Olive Oil with Garlic and Rosemary
While the yeast is activating, heat 2 tablespoons of olive oil in a small skillet over medium heat. Add the minced garlic and chopped rosemary. Sauté for 1-2 minutes until the garlic is fragrant but not browned. Set this mixture aside to cool slightly. This step ensures that the flavors are evenly distributed throughout the dough.
Tip: For a stronger rosemary flavor, add half of this mixture directly into the dough and save the rest for brushing the loaf later.
Step 3: Mix the Dough
In a large mixing bowl, combine the flour and salt. Make a well in the center and pour in the activated yeast mixture, infused olive oil, and garlic-rosemary mix. Stir with a dough scraper or wooden spoon until the dough starts to come together.
Pro Tip: If the dough feels too sticky, add an additional tablespoon of flour at a time. If it feels too dry, add a teaspoon of water until you achieve the right consistency.
Step 4: Knead the Dough
Transfer the dough to a lightly floured surface. Knead it for 8-10 minutes until it becomes smooth and elastic. This step is crucial for developing the gluten that gives bread its structure and chewiness.
Alternative: Use a stand mixer with a dough hook attachment on medium speed for about 6 minutes if you prefer not to knead by hand.
Step 5: First Rise
Shape the dough into a ball and place it in a lightly oiled bowl. Cover it with a clean kitchen towel or plastic wrap and let it rise in a warm, draft-free spot for 1 to 1½ hours, or until it doubles in size.
Tip: If your kitchen is cold, place the bowl in an oven that has been preheated to 200°F (93°C) and then turned off.
Step 6: Shape the Dough
Once the dough has risen, punch it down gently to release air bubbles. Transfer it back to the floured surface and shape it into a round boule or an oval loaf, depending on your preference.
For a more rustic look, create shallow slashes across the top of the dough using a sharp knife or bread lame. This not only looks beautiful but also helps the bread expand evenly during baking.
Step 7: Second Rise
Place the shaped dough onto a parchment-lined baking sheet or into a Dutch oven. Cover it again and let it rise for another 30-40 minutes.
Step 8: Preheat the Oven
Preheat your oven to 450°F (232°C). If you’re using a Dutch oven, place it inside the oven to preheat as well.
Pro Tip: Adding steam to the oven creates a crustier loaf. Place a small oven-safe dish of water on the lower rack during preheating.
Step 9: Bake the Bread
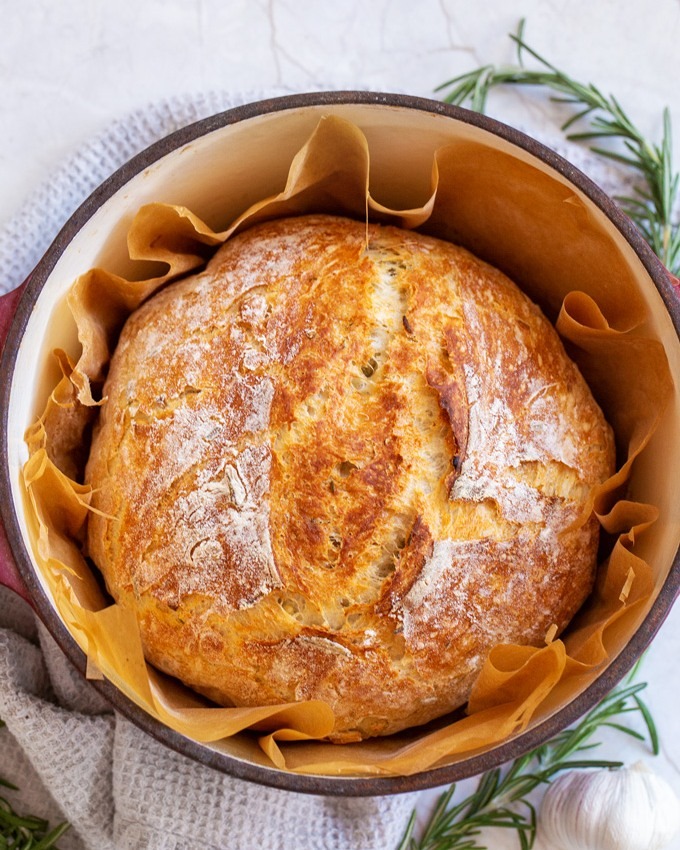
Brush the risen dough with olive oil and sprinkle it with coarse sea salt and additional rosemary sprigs. Transfer it to the oven and bake for 25-30 minutes, or until the crust is golden brown and the bread sounds hollow when tapped.
If you’re using a Dutch oven, bake with the lid on for the first 20 minutes, then remove the lid for the remaining time to achieve a crisp crust.
Step 10: Cool and Serve
Remove the bread from the oven and let it cool on a wire rack for at least 15-20 minutes before slicing. This resting time allows the bread’s interior to set properly.
Serving Suggestions:
- Pair with olive oil and balsamic vinegar for dipping.
- Use it to make gourmet sandwiches.
- Serve alongside soups and stews.
Final Thoughts
Making Garlic Rosemary Bread at home is a deeply rewarding experience that transforms simple ingredients into something extraordinary. With its aromatic blend of garlic and rosemary and its perfectly textured crust, this bread will quickly become a favorite in your household. Whether you’re a seasoned baker or a novice, this detailed recipe ensures success and plenty of opportunities to impress your family and friends.
So, what are you waiting for? Roll up your sleeves and start baking—your kitchen is about to smell heavenly!
