Step 1: Prepare Your Work Area
Before you start, gather all your ingredients and tools. Line a 9×13-inch baking dish with parchment paper, leaving some overhang for easy removal later. This will help prevent sticking and make it easier to cut your treats into desired shapes.
Step 2: Melt the Butter and Marshmallows
In a medium saucepan, melt the butter over low heat. Once melted, add the mini marshmallows. Stir continuously until the marshmallows are completely melted and the mixture is smooth. If using, add the vanilla extract during this stage for added flavor. Be careful not to overheat, as this can make the mixture too sticky.
Step 3: Combine with Rice Krispies
Once the marshmallows are fully melted, remove the saucepan from the heat. Immediately add the Rice Krispies cereal to the marshmallow mixture. Using a wooden spoon or spatula, gently fold the cereal into the melted marshmallows until they are well coated. Be careful not to crush the cereal; you want to keep that signature crunch!
Step 4: Shape the Mixture
Using your greased hands or a spatula, press the mixture evenly into the prepared baking dish. Make sure to pack it down firmly to create a solid base. Allow the mixture to cool at room temperature for about 30 minutes, or until it is set.
Step 5: Cut into Pudding Shapes
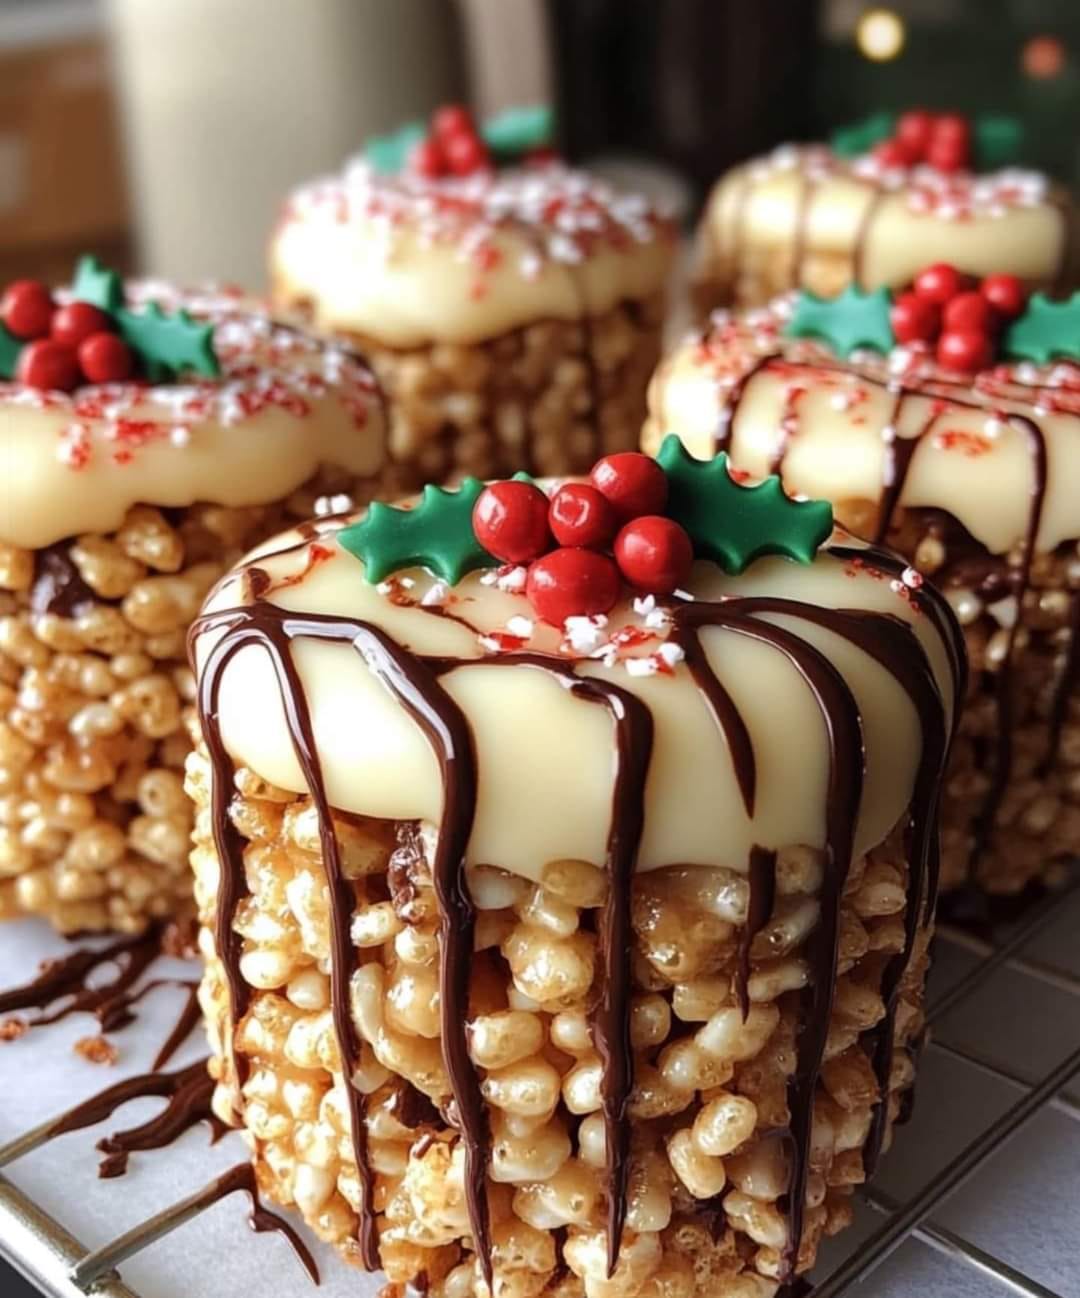
Once the Rice Krispie mixture has cooled and firmed up, remove it from the baking dish by lifting the parchment paper overhang. Place it on a cutting board and cut it into round shapes using a cookie cutter or a small glass. Aim for about 2 to 3 inches in diameter to resemble miniature puddings.
Step 6: Prepare the Chocolate Coating
In a microwave-safe bowl, combine the semi-sweet chocolate chips and vegetable oil. Heat in the microwave in 30-second intervals, stirring in between, until the chocolate is fully melted and smooth. The oil helps to thin the chocolate, making it easier to coat the Rice Krispie treats.
Step 7: Coat the Rice Krispie Puddings
Dip each round Rice Krispie treat into the melted chocolate, ensuring it is fully coated. Use a fork to lift it out, allowing any excess chocolate to drip off. Place the coated treats onto a cookie sheet lined with wax paper or parchment paper to set.
Step 8: Drizzle with White Chocolate
Melt the white chocolate chips in a microwave-safe bowl in the same way you melted the semi-sweet chocolate. Once melted, transfer the white chocolate to a piping bag or a zip-top bag with a small corner cut off. Drizzle the white chocolate over the chocolate-coated Rice Krispie puddings for a decorative touch.
Step 9: Add the Finishing Touches
While the white chocolate drizzle is still soft, sprinkle red and green sprinkles on top for a festive look. If you’re using edible gold dust or glitter, now is the time to sprinkle that on as well. If you have marzipan or fondant, you can create small holly leaves and berries to add to the top of each pudding for an extra special touch.
Step 10: Let Them Set
Allow the coated Rice Krispie Christmas puddings to sit at room temperature until the chocolate is fully set, about 1 hour. If you’re in a hurry, you can place them in the refrigerator for about 15-20 minutes to speed up the process.
Step 11: Serve and Enjoy
Once set, your Rice Krispie Christmas Puddings are ready to be enjoyed! Arrange them on a festive platter, and watch as they become a highlight at your holiday gatherings. These treats are perfect for parties, as gifts, or simply for satisfying your sweet tooth during the festive season.
Storage Tips:
Store any leftover Rice Krispie Christmas Puddings in an airtight container at room temperature for up to a week. If you live in a warm climate, it’s best to keep them in the refrigerator to prevent the chocolate from melting.
Conclusion:
Rice Krispie Christmas Puddings are not only a delightful treat to make but also a fantastic way to spread holiday cheer. With their cute, pudding-like appearance and delicious chocolate coating, they’re sure to be a hit with kids and adults alike. Follow this detailed recipe to create these fun, no-bake desserts that will surely become a cherished part of your holiday traditions. Happy baking, and may your Christmas be filled with joy, love, and lots of sweet treats !
