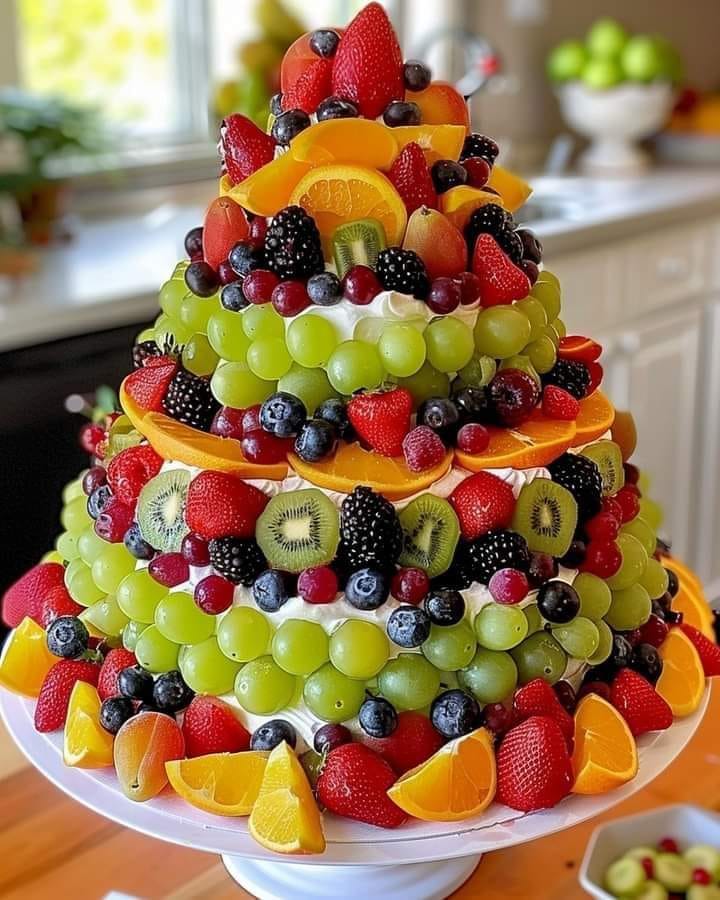
Step 1: Bake the Sponge Cakes
- Preheat Oven and Prepare Pans: Preheat your oven to 350°F (175°C). Grease and line three cake pans—one 8-inch, one 6-inch, and one 4-inch—with parchment paper.
- Mix the Dry Ingredients: In a medium bowl, sift together the flour, baking powder, and salt.
- Cream Butter and Sugar: In a large mixing bowl, cream the softened butter and granulated sugar with an electric mixer until light and fluffy, about 3 minutes.
- Add Eggs and Vanilla: Add eggs one at a time, mixing well after each addition. Stir in the vanilla extract.
- Alternate Adding Dry Ingredients and Milk: Gradually add the dry ingredients, alternating with the milk, beginning and ending with the flour mixture. Mix just until combined—overmixing can make the cake dense.
- Bake: Divide the batter between the prepared pans, filling each about halfway. Bake the 4-inch cake for 20-25 minutes, the 6-inch cake for 25-30 minutes, and the 8-inch cake for 30-35 minutes. A toothpick inserted in the center should come out clean.
- Cool Cakes: Let cakes cool in their pans for 10 minutes before transferring to a wire rack to cool completely.
Step 2: Prepare the Whipped Cream Frosting
- Chill the Bowl and Whisk: For the best whipped cream, chill your mixing bowl and whisk attachment in the freezer for 10 minutes.
- Beat the Cream: In the chilled bowl, beat the heavy cream, powdered sugar, and vanilla extract on medium-high speed until stiff peaks form, about 3-5 minutes. Do not overbeat, as the cream can turn grainy.
Step 3: Assemble the Cake
- Level the Cakes: Use a serrated knife to trim the tops of each cake layer so they’re flat.
- Add the Whipped Cream Frosting: Place the 8-inch cake layer on a cake stand or plate and spread a layer of whipped cream on top. Arrange a layer of sliced strawberries and other fruits, then add a little more whipped cream to secure the next layer.
- Continue Layering: Repeat with the 6-inch and 4-inch cakes, spreading whipped cream and adding fresh fruit between each layer.
- Frost the Outside of the Cake: Once all tiers are stacked and filled, use the remaining whipped cream to lightly frost the outside of each tier. For a “naked” cake look, keep the frosting thin to let the sponge cake layers peek through.
Step 4: Decorate with Fresh Fruit
- Top Each Tier with Fruit: Arrange additional fresh fruit on the top of each tier and along the edges. Use blueberries, strawberries, raspberries, and kiwi slices for a colorful finish.
- Optional Garnish: Add a few fresh mint leaves for a pop of color and a touch of elegance.
Tips for Perfect Results
- Secure Each Tier: If transporting the cake, insert a few dowels or thick straws into the bottom two layers for added stability.
- Use Fresh, Ripe Fruit: Fresh, ripe fruit will enhance the cake’s flavor and add vibrant color.
- Serve Chilled: This cake is best served chilled due to the whipped cream frosting and fresh fruit layers.
Serving and Storing
Serving Suggestions: Slice the cake gently with a sharp knife, allowing each piece to feature both the cake and fresh fruit filling.
Storing: Cover and refrigerate any leftovers for up to 3 days. Due to the whipped cream frosting and fresh fruit, this cake should remain chilled.
Final Thoughts
This Fresh Fruit Three-Tiered Cake is as delightful to eat as it is beautiful to look at, offering a burst of fruit flavor and light, creamy layers in every bite. Ideal for a show-stopping dessert, it’s a recipe you’ll find yourself returning to for special occasions or any time you want to impress your guests!
