Step 1: Preheat and Prepare
- Preheat your oven to 350°F (175°C) and grease a 9-inch round cake pan with butter or nonstick spray. Line the bottom with parchment paper for easy removal.
Step 2: Mix the Wet Ingredients
- In a large bowl, beat together the butter and sugar until light and fluffy. This step helps incorporate air, resulting in a light cake.
- Add the eggs, one at a time, beating well after each addition. Stir in the vanilla extract and lemon zest if using.
- Next, fold in the Greek yogurt and mix until smooth and creamy. The yogurt is the star of the cake, so be sure it’s fully incorporated.
Step 3: Combine the Dry Ingredients
- In a separate bowl, whisk together the flour, baking powder, baking soda, and salt.
- Gradually add the dry ingredients to the wet mixture, alternating with the milk. Begin and end with the dry ingredients, mixing just until everything is combined. Be careful not to overmix—the key to a tender cake is a gentle hand.
Step 4: Bake the Cake
- Pour the batter into the prepared pan and smooth the top with a spatula.
- Bake for 35–40 minutes, or until a toothpick inserted into the center of the cake comes out clean. The cake should be golden brown on top and smell absolutely divine.
- Allow the cake to cool in the pan for about 10 minutes before transferring it to a wire rack to cool completely.
Step 5: Serve and Enjoy
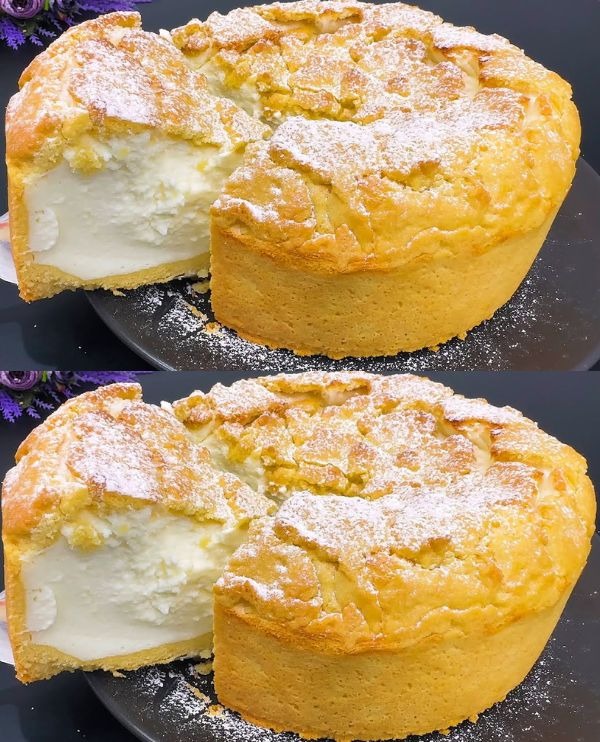
- Once the cake is fully cooled, you can serve it as is or dust the top with powdered sugar for a touch of elegance. If you’re feeling adventurous, you can also drizzle it with a simple lemon glaze or serve with fresh berries and whipped cream.
Customizing Your Yogurt Cake
One of the best things about yogurt cake is its versatility. Here are a few ideas to make this cake your own:
- Add fruits: Fold in fresh blueberries, raspberries, or diced peaches for a burst of fruity flavor.
- Use flavored yogurt: Swap out plain yogurt for lemon, vanilla, or even strawberry yogurt to infuse the cake with subtle flavor variations.
- Spice it up: Add a pinch of cinnamon, nutmeg, or cardamom to the batter for a warm, spiced version of the cake.
- Glaze it: A lemon glaze made from lemon juice and powdered sugar adds a tangy-sweet finish that complements the creamy cake beautifully.
Storing and Serving Suggestions
This cake stores beautifully, staying moist and tender for up to 3 days when kept in an airtight container at room temperature. If you prefer, you can refrigerate the cake, and it will last even longer—up to 5 days. Just be sure to bring it back to room temperature before serving, or give it a few seconds in the microwave for a warm, fresh-out-of-the-oven taste.
Pair this cake with a cup of coffee or tea for a light afternoon snack, or dress it up with whipped cream and berries for an elegant dessert at your next gathering.
Frequently Asked Questions
Q: Can I use non-Greek yogurt for this cake?
A: Yes! Any plain yogurt will work well, though Greek yogurt tends to make the cake a bit creamier and richer in texture.
Q: Can I make this cake gluten-free?
A: Absolutely! Simply substitute the all-purpose flour with a good-quality gluten-free flour blend. Just be sure it’s one designed for baking.
Q: Can I freeze this cake?
A: Yes, this cake freezes well. Wrap it tightly in plastic wrap and store it in an airtight container for up to 3 months. Thaw at room temperature and enjoy!
The Magic of Yogurt Cake
The magic of Creamy Yogurt Cake lies in its simplicity. It’s the kind of cake that’s light and versatile enough to be enjoyed every day, yet special enough to be dressed up for any occasion. With its creamy texture, balanced sweetness, and endless customization options, this cake is bound to become one of your go-to recipes for a delicious, homemade treat that will have everyone asking for seconds. So, grab some yogurt and start baking—you’ll soon discover the magic for yourself!