1. Prepare the Dough:
- In a small bowl, dissolve the sugar in the warm water. Sprinkle the yeast over the top and let it sit for about 5 minutes, or until it becomes frothy.
- In a large mixing bowl, combine 3 1/2 cups of flour and salt. Make a well in the center and add the yeast mixture and olive oil.
- Mix until a dough forms. If the dough is too sticky, gradually add more flour, a tablespoon at a time, until the dough is smooth and elastic.
- Knead the dough on a lightly floured surface for about 5-7 minutes, until it becomes soft and elastic.
- Place the dough in a lightly oiled bowl, cover it with a damp cloth, and let it rise in a warm place for about 1 hour, or until it has doubled in size.
2. Prepare the Filling:
- While the dough is rising, prepare the filling. In a medium bowl, combine the mozzarella cheese, feta cheese, cooked ground beef or lamb (if using), bell peppers, onions, olives, parsley, paprika, cumin, salt, and pepper. Mix well and set aside.
3. Assemble the Pide:
- Preheat your oven to 475°F (245°C) and place a pizza stone or baking sheet in the oven to heat.
- Punch down the risen dough and divide it into 2-4 equal portions, depending on how large you want your pides.
- On a lightly floured surface, roll out each portion of dough into an oval or boat shape, about 1/4 inch thick.
- Transfer the rolled-out dough to a piece of parchment paper or a lightly floured pizza peel.
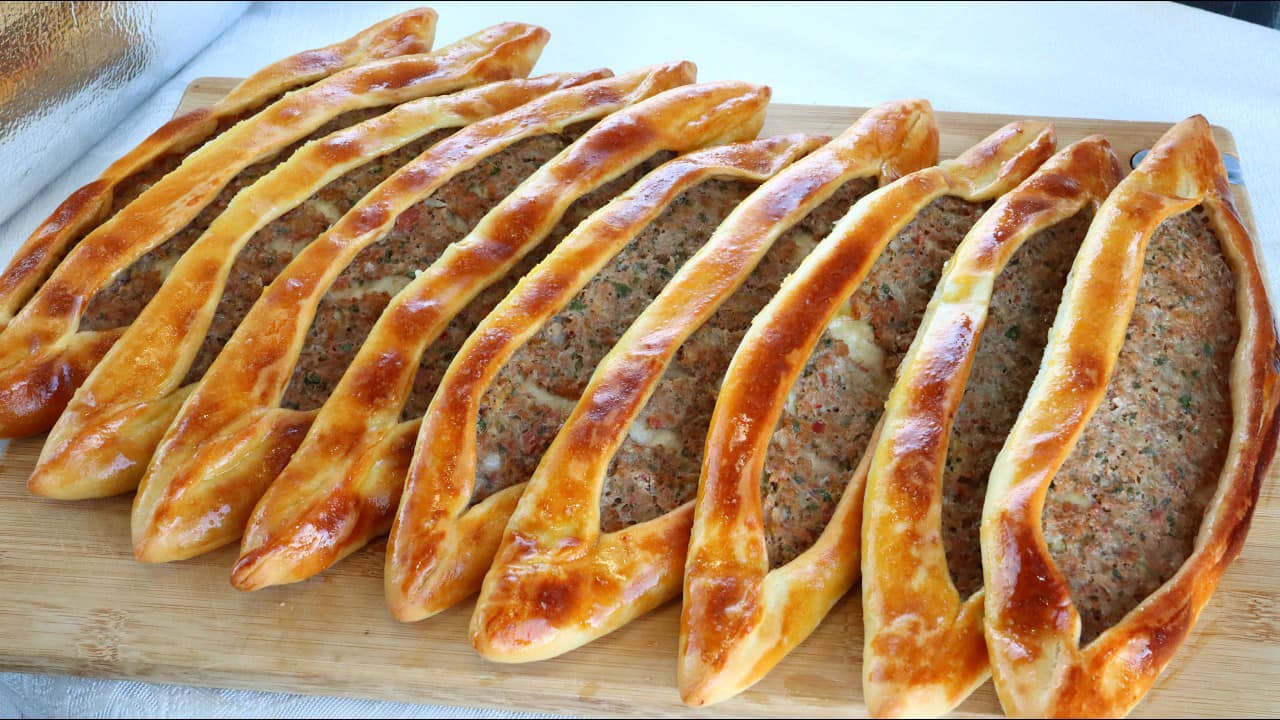
- Spread the filling evenly over the dough, leaving a small border around the edges.
4. Bake the Pide:
- Carefully transfer the prepared pide to the preheated pizza stone or baking sheet in the oven.
- Bake for 12-15 minutes, or until the edges are golden brown and crispy, and the cheese is melted and bubbly.
- While the pides are baking, prepare the egg wash by mixing the beaten egg with 1 tablespoon of water.
- Remove the pides from the oven and brush the edges with the egg wash for a shiny finish.
5. Serve:
- Allow the pides to cool for a few minutes before slicing.
- Garnish with additional fresh parsley if desired.
- Serve warm with a side salad or your favorite dipping sauces.
6. Enjoy:
- Enjoy your homemade crispy pide with its delightful combination of flavors and textures!
Tips for Success:
- Dough: If the dough is too sticky, add more flour gradually. If it’s too dry, add a little more water.
- Filling: Feel free to customize the filling with your favorite ingredients, such as different types of cheese or vegetables.
- Crispiness: For an extra crispy crust, you can brush the dough with a little olive oil before adding the filling.
Conclusion: Homemade Crispy Pide is a fantastic way to enjoy a flavorful and satisfying meal with a delightful crispy crust. By following this recipe, you’ll create a deliciously golden and crunchy pide that’s perfect for any occasion. Whether served as a main dish or appetizer, it’s sure to be a hit with family and friends!