Step 1: Prepare the Ingredients
- Cook the Meat: In a skillet, cook the ground meat with taco seasoning according to package instructions. Set aside to cool.
- Chop Vegetables: Prepare the lettuce and tomatoes, and any other fresh ingredients you plan to use.
Step 2: Assemble the Crunchwraps
- Layer Ingredients: Lay a large tortilla flat on your work surface. In the center, spread a portion of the nacho cheese or shredded cheese. Add a layer of cooked meat.
- Add Crunch: Place a tostada shell on top of the meat. Spread a thin layer of sour cream over the tostada, then add lettuce, tomatoes, and any additional toppings like salsa or onions.
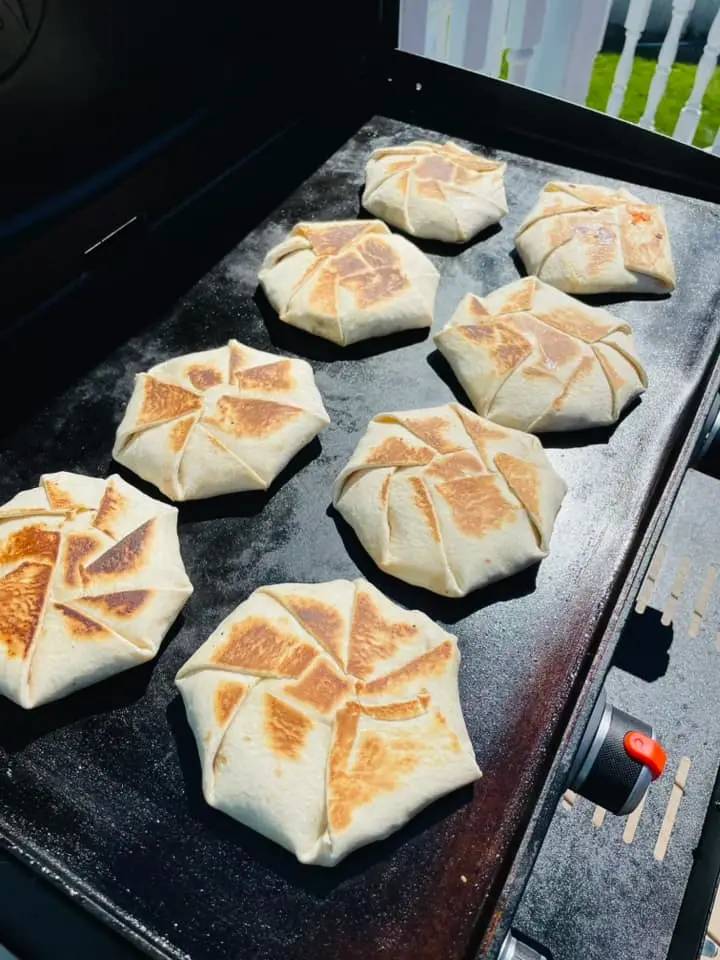
- Wrap It Up: Fold the edges of the tortilla toward the center, creating a flat-bottomed, hexagonal package. Repeat with the remaining tortillas.
Step 3: Cook the Crunchwraps
- Heat a Skillet: Warm a non-stick skillet over medium heat. Place the Crunchwrap seam-side down and cook until the bottom is golden brown and sealed, about 3-5 minutes. Flip and cook the other side until crispy.
- Cool Before Packing: Let them cool completely before packing into meal prep containers to prevent sogginess.
Step 4: Pack and Store
- Storage: Place each Crunchwrap in a separate meal prep container. If the Crunchwraps will be eaten within 2-3 days, they can be stored in the refrigerator. For longer storage, wrap each Crunchwrap tightly in foil or plastic wrap and freeze.
- Reheating: If refrigerated, microwave the Crunchwrap for 1-2 minutes until heated through. If frozen, thaw in the refrigerator overnight before reheating.
Step 5: Serving Suggestions
- Pack Extras: Include a small container of extra salsa or hot sauce for added moisture and flavor when reheating.
- Include Sides: Consider packing a side of fruit, veggies, or a small salad to round out the meal.
Conclusion
These homemade Crunchwraps are not only a tasty and practical lunch option but also a customizable meal that can be tailored to include your husband’s favorite ingredients. With this meal prep plan, you can ensure he has a hearty, enjoyable lunch ready every day of the week, saving both time and money while keeping mealtime interesting and flavorful.