Step 1: Preheat the Oven
Preheat your oven to 400°F (200°C).
Step 2: Prepare the Lobster Tails
Using sharp kitchen scissors or a chef’s knife, carefully cut the lobster tails down the center, starting from the top shell and stopping just before the tail fin. Be gentle so you don’t cut all the way through. Gently pull the lobster meat out of the shell and fan it out slightly, leaving it connected at the base.
Step 3: Season the Lobster Tails
Drizzle the lobster tails with olive oil, then season them generously with sea salt and black pepper.
Step 4: Make the Garlic Butter
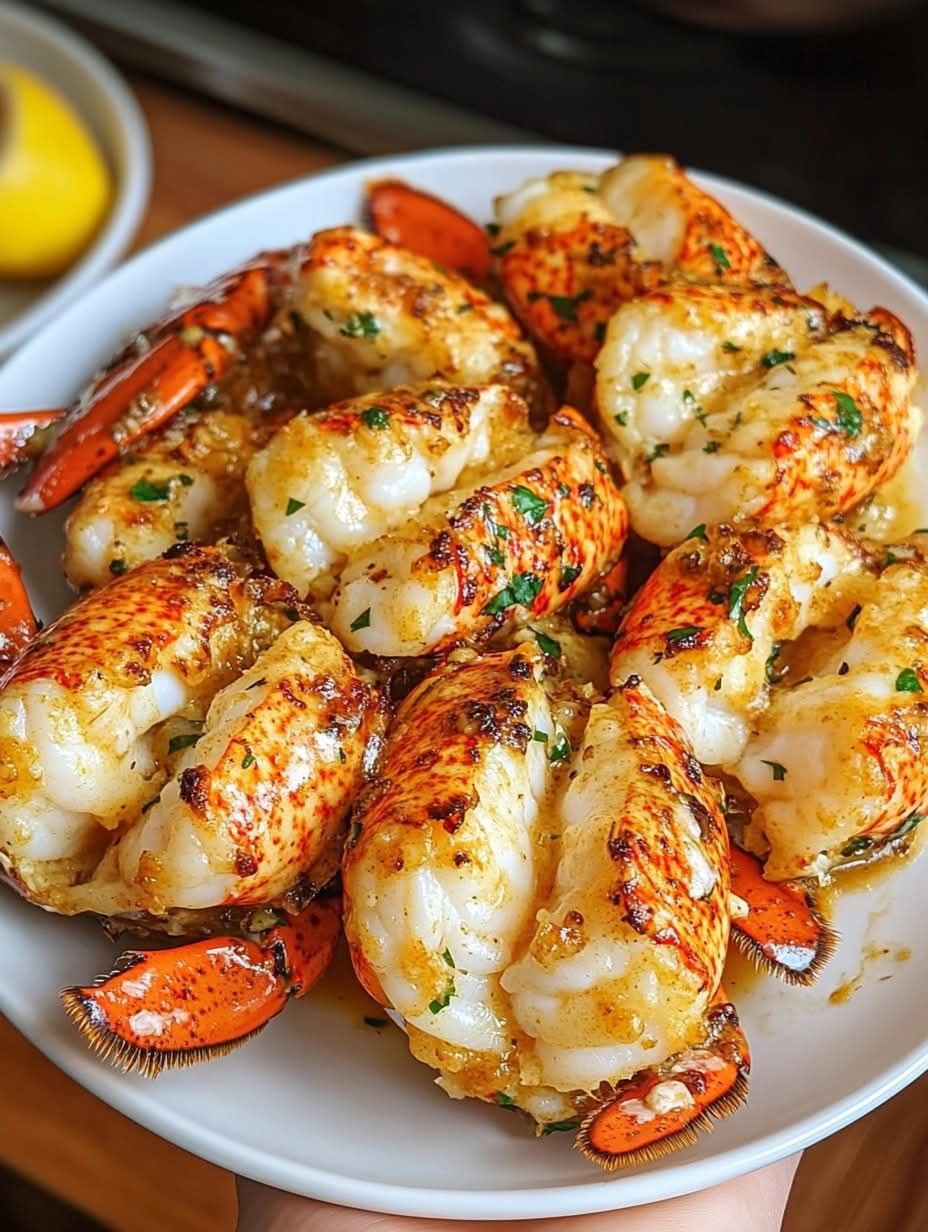
In a small bowl, mix together the melted butter, minced garlic, chopped parsley, paprika, red pepper flakes (if using), lemon juice, and grated Parmesan cheese (if using). Stir until combined.
Step 5: Brush the Lobster Tails
Using a pastry brush, generously brush the garlic butter mixture onto each lobster tail, ensuring you coat both the meat and the top shell.
Step 6: Bake the Lobster Tails
Place the lobster tails on a lined baking sheet (skin side down). Pour any remaining garlic butter mixture over the tops. Cover loosely with aluminum foil to prevent the lobster from drying out.
Bake in the preheated oven for 12-15 minutes, or until the lobster meat is opaque and cooked through. If you have a meat thermometer, the internal temperature of the lobster meat should reach 135°F (57°C).
Step 7: Broil (Optional)
To give the lobster tails a nice golden color, you can remove the foil and broil them for an additional 2-3 minutes, keeping a close eye so they don’t burn.
Step 8: Garnish and Serve
Remove from the oven, garnish with lemon wedges and parsley sprigs, and serve immediately.
Serving Suggestions
Serve your Garlic Butter Lobster Tails with a side of roasted vegetables, creamy mashed potatoes, or a fresh green salad for a complete gourmet meal. A glass of chilled white wine pairs beautifully with this dish!
Why You’ll Love This Recipe
- Elegant Flavor: The garlic butter brings out the rich, sweet flavor of the lobster while adding a hint of spice and brightness from the lemon.
- Perfectly Cooked Lobster: This recipe ensures your lobster tails come out tender and juicy, without being overcooked.
- Quick and Impressive: Despite feeling fancy, this dish is simple to prepare with minimal hands-on effort.
- Great for Any Occasion: Whether you’re hosting a romantic dinner for two or a small gathering, this dish always feels special.
Storage Tips
Lobster is best enjoyed fresh, but if you have leftovers, store them in an airtight container in the refrigerator for up to 1-2 days. Reheat gently in the oven or microwave, but be careful not to overcook.