Stage 1: Activate the Yeast
- Activate the Yeast: In a small bowl, combine the warm water, sugar, and active dry yeast. Stir gently to combine and let it sit for 5-10 minutes, or until it becomes frothy. This step activates the yeast and ensures it’s working properly.
Stage 2: Prepare the Dough
- Mix the Dry Ingredients: In a large mixing bowl, combine the all-purpose flour, salt, and cornstarch (if using). Stir to combine.
- Add Wet Ingredients: Once the yeast mixture is frothy, add it to the dry ingredients along with the olive oil (or melted butter) and honey (if using). Mix everything together until the dough starts to come together.
- Knead the Dough: Turn the dough out onto a lightly floured surface and knead for about 8-10 minutes until the dough is smooth, elastic, and slightly tacky (but not sticky). Add a small amount of flour if the dough is too sticky, but be careful not to add too much.
- First Rise: Place the dough into a greased bowl and cover it with a damp cloth or plastic wrap. Let it rise in a warm place for about 1-1.5 hours, or until it has doubled in size.
Stage 3: Shape and Second Rise
- Punch Down the Dough: Once the dough has risen, punch it down gently to release any air bubbles.
- Shape the Dough: Shape the dough into a loaf by folding the sides inwards and rolling it tightly from one end to the other. Pinch the seams to seal the dough.
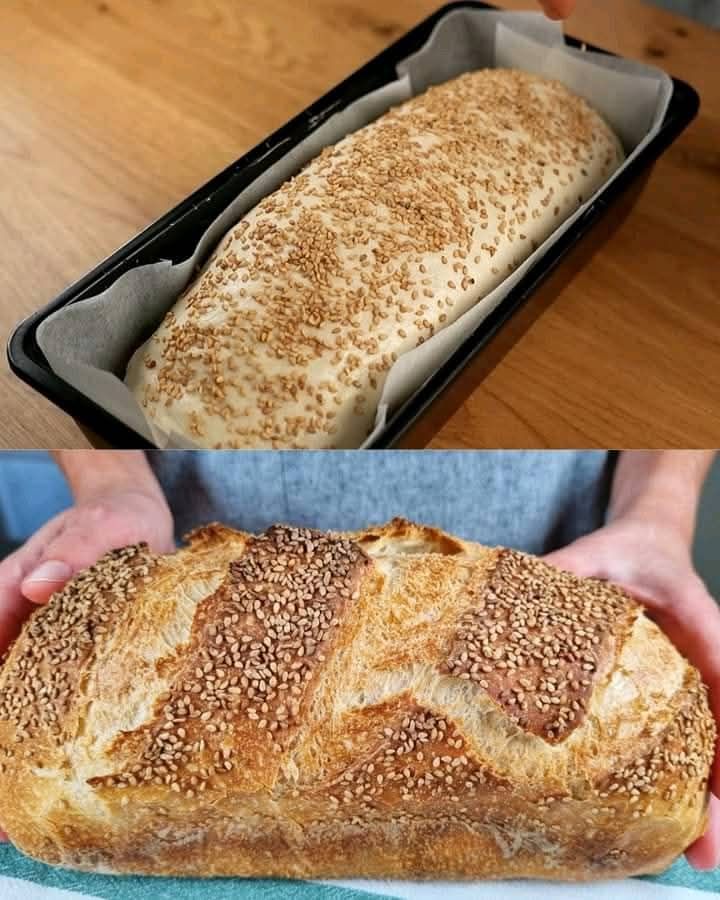
- Prepare the Pan: Lightly grease a 9×5-inch loaf pan or dust it with cornmeal (for added texture) and flour. Place the shaped dough in the pan.
- Second Rise: Cover the pan with a damp cloth and let the dough rise again for about 30-40 minutes, or until it has risen just above the edge of the pan.
Stage 4: Bake the Bread
- Preheat the Oven: Preheat your oven to 375°F (190°C). Place a shallow pan of water on the bottom rack of the oven to create steam, which will help develop the crispy crust.
- Bake the Bread: Once the dough has finished rising, place the pan in the preheated oven and bake for about 25-30 minutes, or until the top of the bread is golden brown and the loaf sounds hollow when tapped on the bottom.
- Optional: Crisp the Crust: For an extra-crispy crust, after baking, place the bread directly on the oven rack and bake for an additional 5-10 minutes until the desired crispiness is achieved.
Stage 5: Cool and Serve
- Cool the Bread: Allow the bread to cool in the pan for about 10 minutes before transferring it to a wire rack to cool completely. This helps prevent the bottom from getting soggy.
- Slice and Serve: Once cooled, slice the bread into thick, fluffy slices and serve with butter, jam, or your favorite spreads.
Additional Tips and Variations:
- Herb Variation: Add fresh herbs like rosemary, thyme, or garlic to the dough for added flavor.
- Shape Options: Instead of using a loaf pan, you can shape the dough into a round or oval shape for a rustic-style bread and bake it on a baking sheet.
- Storage: This bread keeps well for about 3-4 days at room temperature. You can also slice it and freeze it for up to 3 months. To reheat, wrap in foil and bake in a 350°F (175°C) oven for about 10-15 minutes.
- Vegan Version: Substitute the butter with olive oil and skip the honey for a fully vegan loaf.
Conclusion
This Super Soft and Crispy Crust Bread is the perfect combination of a soft, airy interior with a golden, crisp crust. Whether you’re serving it as a side with your favorite meal or simply enjoying it with a spread, this bread is sure to become a favorite in your recipe collection. It’s easy to make, versatile, and incredibly satisfying! Enjoy!
