- Preheat the oven. Preheat your oven to 350°F (175°C). Grease and flour three 6-inch round cake pans (or 2 pans, depending on the number of layers you want) or line the pans with parchment paper circles for easy removal.
- Mix the dry ingredients. In a medium bowl, whisk together the flour, cocoa powder, baking soda, and salt. Set aside.
- Cream the butter and sugar. In a large mixing bowl, beat the softened butter and sugar together using an electric mixer on medium speed until light and fluffy, about 3-5 minutes.
- Add the eggs and vanilla. Beat in the eggs, one at a time, mixing well after each addition. Add the vanilla extract and mix until combined.
- Add the buttermilk and food coloring. In a separate bowl, combine the buttermilk and red food coloring, then add it to the butter mixture. Mix until fully incorporated.
- Combine dry and wet ingredients. Gradually add the dry ingredients to the wet ingredients, alternating with the vinegar. Start and end with the dry ingredients. Mix until smooth but avoid overmixing.
- Bake the cakes. Divide the batter evenly between the prepared cake pans. Bake in the preheated oven for about 25-30 minutes or until a toothpick inserted into the center comes out clean.
- Cool the cakes. Allow the cakes to cool in the pans for 10 minutes, then transfer them to a wire rack to cool completely.
Stage 2: Preparing the Cream Cheese Frosting
- Cream the cream cheese and butter. In a large bowl, beat the softened cream cheese and butter together until smooth and creamy, about 2 minutes.
- Add powdered sugar and vanilla. Gradually add the powdered sugar, 1 cup at a time, mixing well after each addition. Add vanilla extract and mix until fluffy.
- Adjust consistency. If the frosting is too thick, add 1-2 tablespoons of heavy cream to reach a spreadable consistency.
- Color the frosting (optional). If you want to make the frosting green to resemble a Christmas tree, add a few drops of green food coloring and mix until fully incorporated.
Stage 3: Assembling the Red Velvet Tree Cake
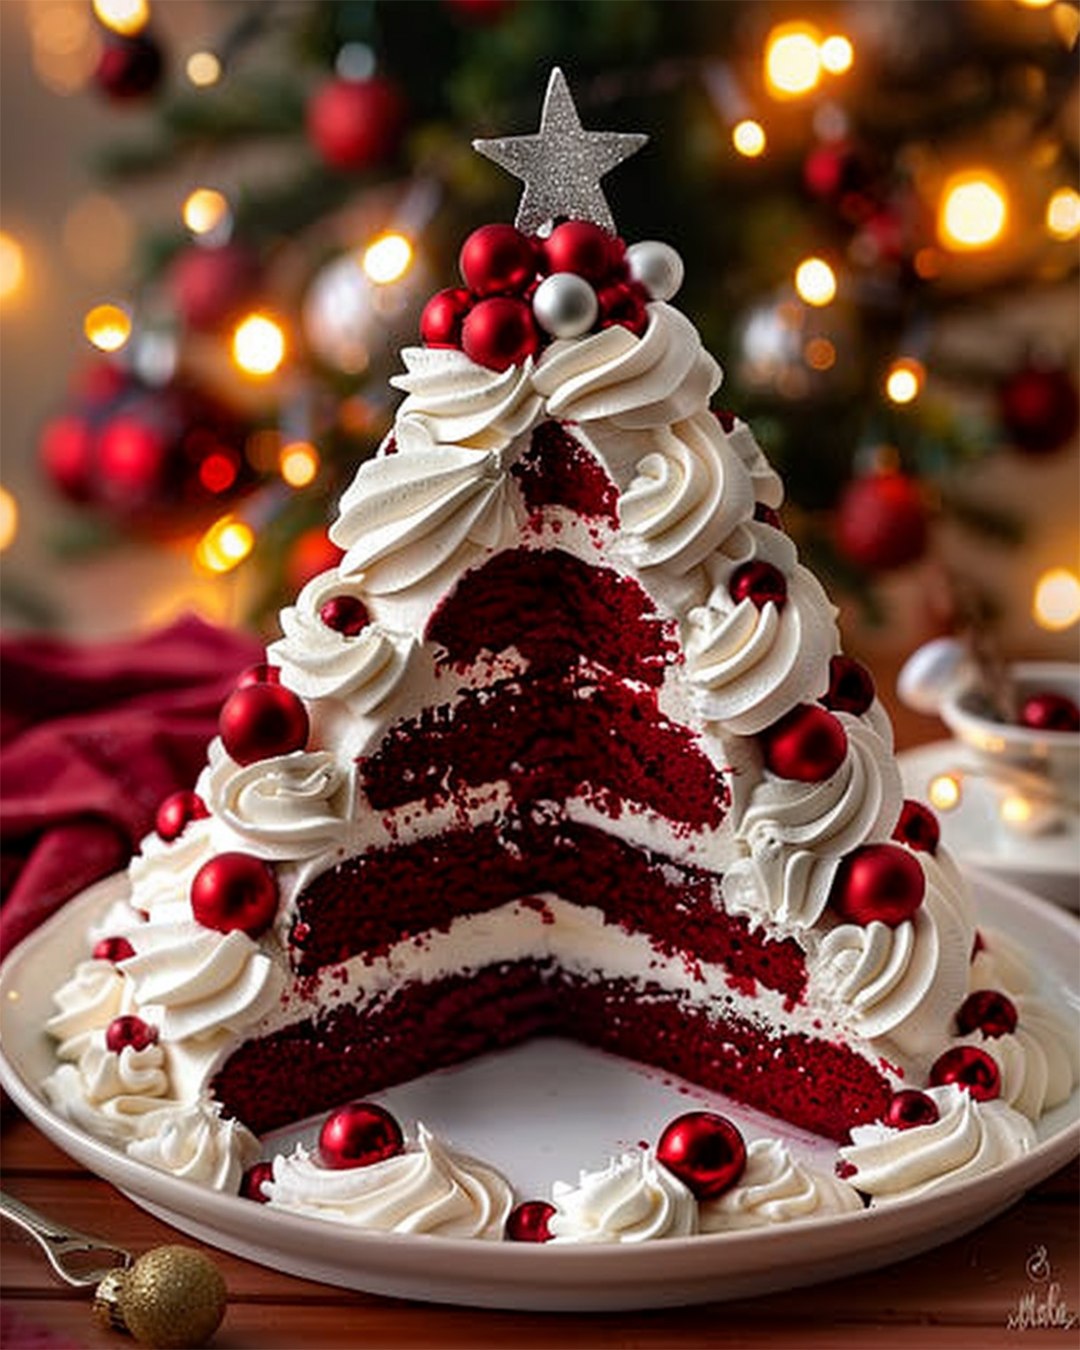
- Shape the tree. Once the cakes are fully cooled, level the tops if necessary. Cut each layer into a triangle shape to create the appearance of a tree. You can cut the layers into thirds or use a round cookie cutter to make the tree shape.
- Frost the layers. Place the first layer of cake on a serving plate and spread a layer of frosting over it. Place the second layer of cake on top and frost again. Continue layering and frosting the remaining cake pieces.
- Shape the tree trunk. After stacking the layers, use the remaining frosting to smooth over the entire cake, shaping it into a tree. You can use a spatula to give the edges a slightly “ruffled” texture for a tree-like effect.
Stage 4: Decorating the Cake
- Add frosting decorations. Using a piping bag with a star tip, pipe star-shaped decorations around the edges of the cake, mimicking the shape of tree branches.
- Decorate with sprinkles. Add colorful sprinkles or edible glitter to the frosting to represent ornaments on the tree. You can also pipe small dots of frosting as “lights” and add a star-shaped decoration on top.
- Chill and serve. Refrigerate the cake for at least 30 minutes to allow the frosting to set and firm up before slicing and serving.
Tips for the Best Red Velvet Tree Cake:
- Use high-quality red food coloring to achieve the most vibrant color for the cake.
- Allow the cake to cool completely before frosting to prevent the frosting from melting.
- Make ahead. You can make the cakes a day in advance and store them in an airtight container. Frost the cake the next day for a quicker preparation.
- Customize decorations. Feel free to add other edible decorations like mini candy canes, or small chocolate pieces for a more festive look.
Final Thoughts:
This Red Velvet Tree Cake is a stunning dessert that combines the classic flavors of red velvet with the festive charm of a Christmas tree. It’s not only delicious but also makes a great centerpiece for holiday parties or family gatherings. The rich cream cheese frosting and vibrant red velvet cake make it a treat that will have everyone coming back for more!
