Step 1: Make the Caramel Base
- In a medium, heavy-bottomed saucepan, combine the granulated sugar and water. Stir gently to moisten the sugar.
- Heat over medium heat, but do not stir. Allow the sugar to dissolve and begin to caramelize, swirling the pan gently to ensure even cooking. The sugar will first turn clear, then start to bubble and change color.
Step 2: Cook Until Amber
- Watch carefully as the sugar changes color. Once it reaches a deep amber shade (around 5-7 minutes), immediately remove the pan from heat. Be careful not to let it burn—caramel can go from perfect to burnt in seconds.
Step 3: Add the Cream
- Slowly and carefully whisk in the heavy cream. The mixture will bubble up vigorously, so take caution. Keep whisking until the bubbling subsides and the cream is fully incorporated.
- If the caramel hardens a little when the cream is added, don’t worry! Place the pan back over low heat and stir until it smooths out again.
Step 4: Add Butter and Vanilla
- Once the cream is incorporated, whisk in the butter pieces, one at a time, until they melt into the caramel.
- Stir in the vanilla extract and a pinch of salt if you want to make a salted caramel version.
Step 5: Cool and Thicken
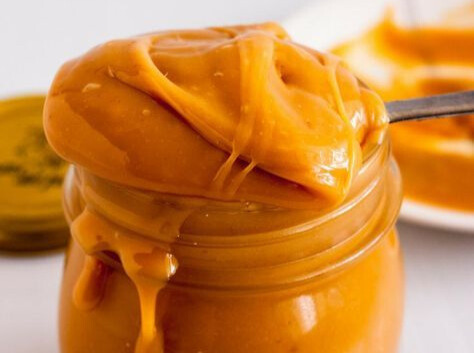
- Transfer the caramel filling to a heatproof bowl and let it cool to room temperature. As it cools, the caramel will thicken to a smooth, spreadable consistency perfect for filling cakes and tarts.
How to Use:
- For Cakes: Spread the caramel filling between cake layers for a rich, gooey middle. You can also drizzle it over the top as a decorative glaze.
- For Tarts: Pour the caramel into a fully baked tart shell and allow it to set before serving. Top with whipped cream, chocolate ganache, or fruit for an extra special treat.
- For Desserts: This caramel is perfect as a drizzle over ice cream, pancakes, or even folded into whipped cream for a quick mousse.
Tips for the Best Caramel Filling:
- Use a Heavy Pan: A thick, heavy-bottomed saucepan ensures the sugar caramelizes evenly without burning.
- Be Patient: Don’t rush the caramelization process. It’s important to let the sugar cook slowly and evenly for the best flavor.
- Keep Stirring: Once you add the cream, stir continuously to prevent lumps from forming.
- Add Salt: If you love salted caramel, feel free to adjust the amount of salt to your taste. A touch of salt enhances the overall flavor.
Storing and Reheating:
- In the Refrigerator: Store leftover caramel filling in an airtight container in the refrigerator for up to 1 week. It will thicken as it chills, but you can bring it back to room temperature before using.
- Reheating: If the caramel gets too thick, gently warm it in the microwave or over a double boiler until it softens to your desired consistency.
Frequently Asked Questions
Q: Can I make this filling ahead of time?
A: Yes! This caramel filling can be made in advance and stored in the refrigerator for several days. Just bring it to room temperature before using.
Q: Can I add other flavors?
A: Absolutely! You can experiment by adding coffee, cinnamon, or even a splash of liquor like bourbon or rum for a unique twist on the classic caramel flavor.
This Creamy Caramel Filling is a versatile, crowd-pleasing addition to any dessert. Its luxurious texture and bold caramel flavor will elevate any cake, tart, or sweet treat to new levels of indulgence. Enjoy!