1. Preheat the Oven & Prep Your Pan
Before you begin, preheat your oven to 350°F (175°C). Line a 9×13-inch baking pan with parchment paper, leaving some overhang on the sides for easy removal later. This step makes it so much easier to lift the bars out after they’ve baked.
2. Make the Crust
In a medium bowl, mix together the melted butter, flour, sugar, and salt until well combined. It should form a slightly crumbly dough that holds together when pressed.
Lazy Girl Tip: No need for a mixer here! Just use a spoon or even your hands. It comes together in less than a minute.
Once the dough is ready, press it firmly into the bottom of the prepared baking pan, making sure it’s spread evenly to cover the entire base.
3. Bake the Crust
Bake the crust for 15-18 minutes, or until it’s lightly golden around the edges. Don’t worry if it seems a bit soft—it will firm up as it cools. Once done, set it aside while you prepare the filling.
4. Prepare the Filling
In a large mixing bowl, whisk together the eggs, brown sugar, corn syrup, melted butter, and vanilla extract. Once the mixture is smooth, fold in the chopped pecans.
Pro Tip: If you like extra texture, reserve a handful of pecans to sprinkle on top before baking. This adds a beautiful, crunchy layer!
5. Pour & Bake
Pour the filling over the pre-baked crust, spreading it evenly with a spatula. If you reserved any pecans, sprinkle them on top now. Return the pan to the oven and bake for 30-35 minutes, or until the filling is set and golden brown on top.
Pro Tip: The bars are ready when the center no longer jiggles, but still looks slightly soft. They will firm up more as they cool.
6. Cool Completely
Once baked, remove the pan from the oven and allow the bars to cool completely in the pan—this step is crucial for clean slicing! If you’re in a hurry, you can speed up the process by placing the pan in the fridge for about 30 minutes.
Slice & Serve: The Easiest Dessert Ever
Once cooled, use the parchment paper overhang to lift the bars out of the pan. Transfer them to a cutting board and slice into squares or rectangles—whatever size your heart desires.
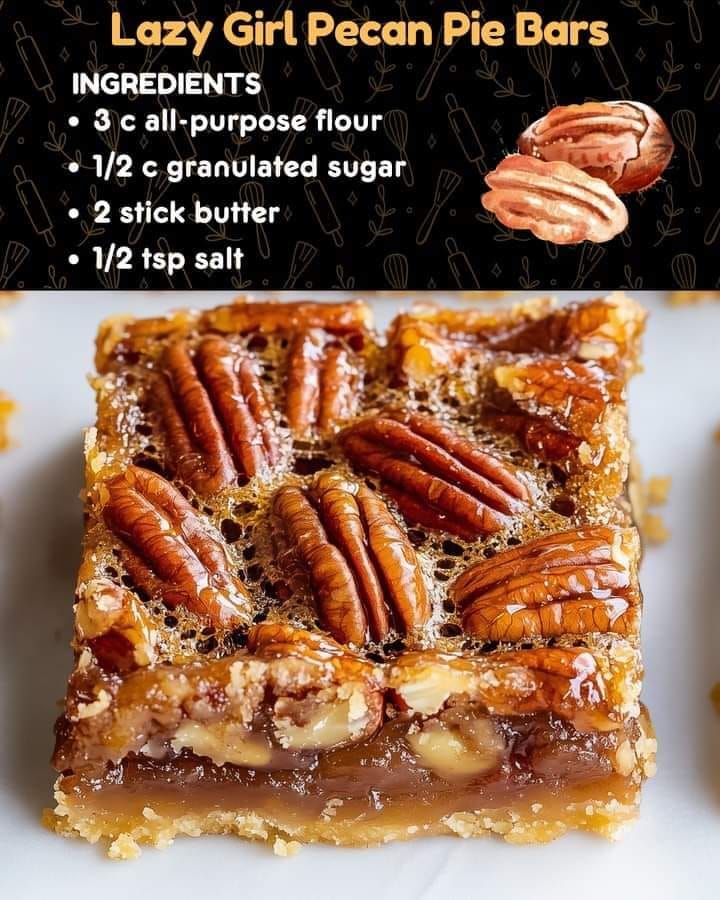
These Lazy Girl Pecan Pie Bars are perfect for serving as-is, but if you really want to impress, serve them with a dollop of whipped cream or a scoop of vanilla ice cream.
Tips & Tricks for the Best Pecan Pie Bars
- Customize the Nuts: While pecans are the star, feel free to mix in other nuts like walnuts or almonds for added variety.
- Make Ahead: These bars store wonderfully! You can make them up to two days in advance and keep them at room temperature, tightly covered. They also freeze well for up to 3 months.
- Gluten-Free Option: Substitute a gluten-free all-purpose flour blend in the crust for a gluten-free version of these bars.
- Make Them Extra Chewy: If you love extra gooey bars, use dark corn syrup instead of light corn syrup for a deeper, richer flavor.
Storage Tips
- Room Temperature: Store your Lazy Girl Pecan Pie Bars in an airtight container at room temperature for up to 5 days. If you like them a little firmer, refrigerate them—they’ll last up to a week chilled.
- Freezing: Wrap each bar individually in plastic wrap, then place them in a freezer-safe zip-top bag. They can be frozen for up to 3 months. To enjoy, thaw them at room temperature or heat them up for a few minutes in the oven.
Why These Bars Are a Must-Try
There’s nothing quite like the combination of buttery crust and gooey pecan filling. These Lazy Girl Pecan Pie Barsare the ultimate dessert for when you want something that tastes like you spent all day in the kitchen, but really only took a few easy steps. The best part? They’re so versatile—perfect for holiday gatherings, picnics, or just a sweet treat to enjoy with a cup of coffee.
So, whether you’re a seasoned baker or just looking for something simple to make on a busy day, this recipe delivers big on flavor with minimal effort. Give these a try, and don’t forget to come back and tell us how they turned out!
This recipe is designed to keep visitors engaged with helpful shortcuts, personalization options, and plenty of tips for making the bars even better. Happy baking!
