1. Prepare the Cucumbers:
- Wash the Cucumbers:
- Thoroughly wash the cucumbers under cold water to remove any dirt or debris. Trim the ends of the cucumbers to prevent the pickles from becoming soft.
- Cut the Cucumbers:
- Depending on your preference, you can leave the cucumbers whole, slice them into spears, or cut them into thick slices. If using larger cucumbers, slicing them into spears or rounds is recommended.
2. Prepare the Brine:
- Make the Brine:
- In a large saucepan, combine the water, white vinegar, kosher salt, and sugar (if using). Bring the mixture to a boil over medium-high heat, stirring occasionally until the salt and sugar are fully dissolved. Remove from heat and let the brine cool slightly.
3. Pack the Jars:
- Sterilize the Jars:
- While the brine is cooling, sterilize your jars and lids by boiling them in water for 10 minutes. This step is crucial for preserving the pickles and preventing spoilage.
- Pack the Jars:
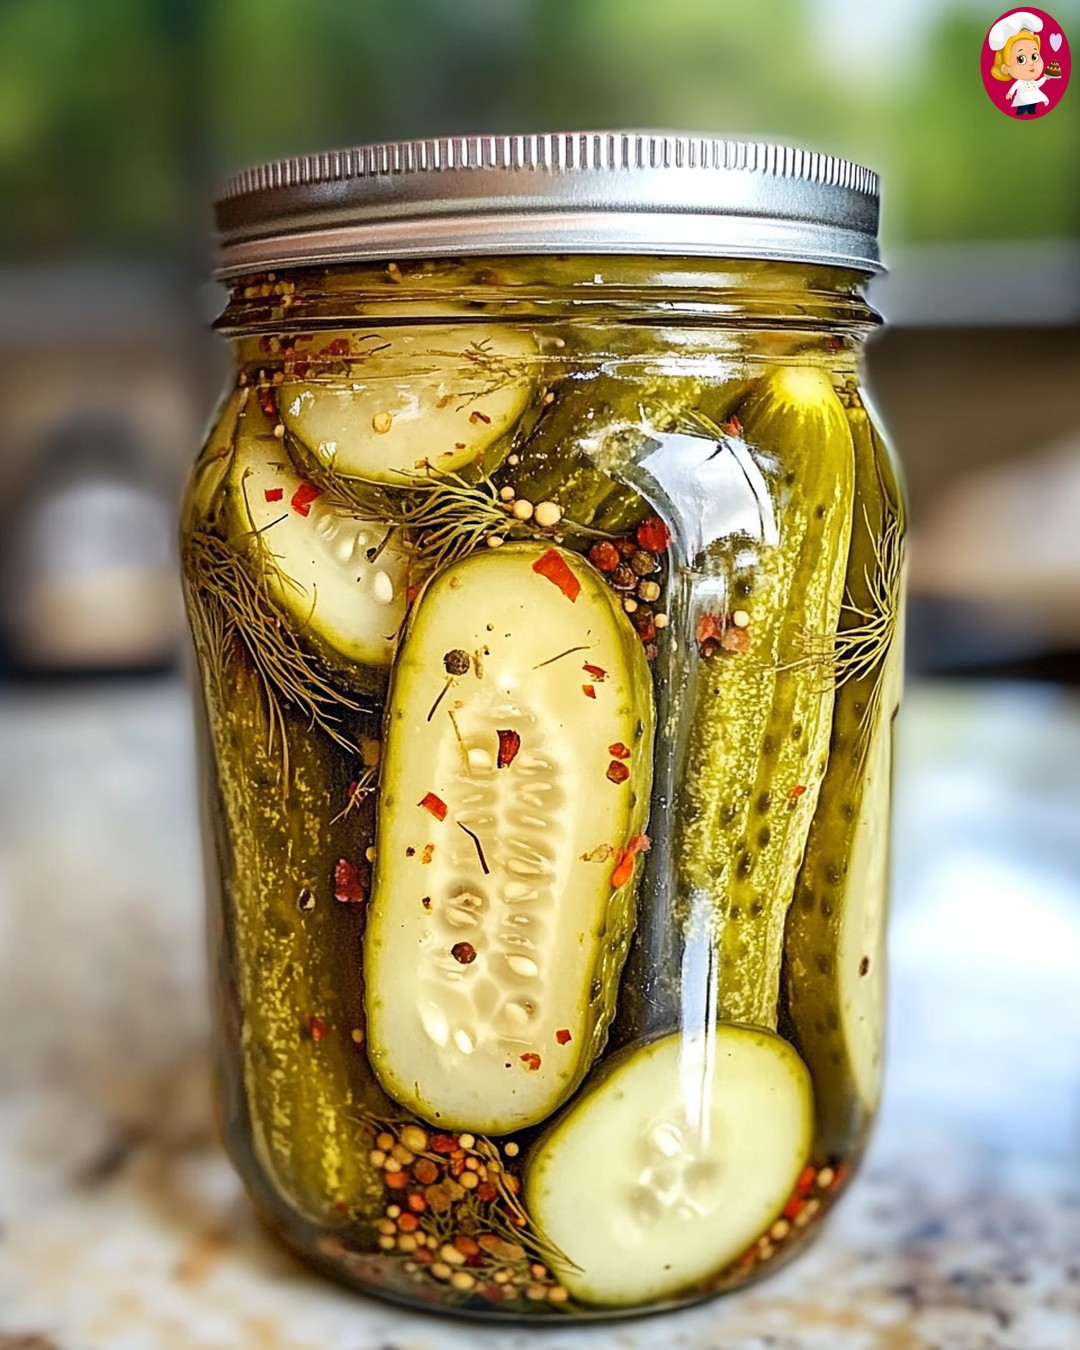
- In each sterilized jar, place a couple of garlic cloves, a dill head (or a tablespoon of dill seeds), a chili pepper, a few peppercorns, mustard seeds, coriander seeds, and a bay leaf. Then, tightly pack the cucumbers into the jars, leaving about ½ inch of headspace at the top.
4. Add the Brine and Seal:
- Pour the Brine:
- Carefully pour the hot brine over the cucumbers in the jars, ensuring that the cucumbers are fully submerged. Use a knife or a skewer to remove any air bubbles trapped between the cucumbers.
- Seal the Jars:
- Wipe the rims of the jars clean with a damp cloth, then place the lids on top and screw on the bands until fingertip tight.
5. Process the Jars (Optional for Longer Storage):
- Water Bath Canning:
- If you want to store the pickles for an extended period at room temperature, process the jars in a boiling water bath for 10 minutes. This step is optional if you plan to store the pickles in the refrigerator.
6. Let the Pickles Cure:
- Cool and Store:
- Allow the jars to cool completely on a towel or rack. Once cooled, check the seals by pressing down on the center of each lid. If it doesn’t pop back, the jar is sealed. Refrigerate any unsealed jars.
- Let the Flavors Develop:
- For the best flavor, let the pickles cure in the refrigerator for at least 1 week before eating. The longer they sit, the more intense the flavors will become.
Tips for Success:
- Pickling Cucumbers: Use small, firm cucumbers for the best crunch. Avoid waxed cucumbers, as the wax can prevent the brine from penetrating the cucumber.
- Adjusting Spice Level: For milder pickles, reduce the number of chili peppers or omit the crushed red pepper flakes. For spicier pickles, add more peppers or include a dash of hot sauce in the brine.
- Crispy Pickles: To ensure your pickles stay crisp, consider adding a few grape leaves or a pinch of alum to each jar.
Serving Suggestions:
- Snacking: Enjoy these pickles straight out of the jar as a spicy, crunchy snack.
- Sandwiches and Burgers: Add these pickles to your favorite sandwiches and burgers for a burst of flavor and heat.
- Salads: Chop the pickles and add them to potato salads, pasta salads, or coleslaw for extra tang and crunch.
Conclusion
Spicy Garlic Dill Pickles are a flavorful and zesty addition to any meal. With their bold garlic and dill flavors, combined with a spicy kick, these pickles are sure to satisfy any pickle lover’s cravings. Whether you’re preserving them for later or enjoying them right away, this recipe is a simple yet delicious way to make homemade pickles with a personal touch. Enjoy the satisfying crunch and complex flavors of these homemade Spicy Garlic Dill Pickles!