- Prepare the Crust:
- In a medium bowl, combine the Biscoff cookie crumbs and melted butter. Mix until all the crumbs are evenly moistened.
- Press the mixture firmly into the bottom of a 9-inch springform pan or a pie dish to form the crust. Set aside in the refrigerator to chill while you prepare the filling.
- Make the Filling:
- In a large mixing bowl, beat the cream cheese until smooth and creamy.
- Add powdered sugar, vanilla extract, and Biscoff spread. Beat until the mixture is completely smooth and well combined.
- Gently fold in the whipped cream until the mixture is uniform. Be careful not to deflate the whipped cream to keep the filling light and fluffy.
- Assemble the Cheesecake:
- Spoon the filling over the chilled crust, smoothing the top with a spatula or the back of a spoon.
- Chill the cheesecake in the refrigerator for at least 4 hours, or overnight, until it’s firm and set.
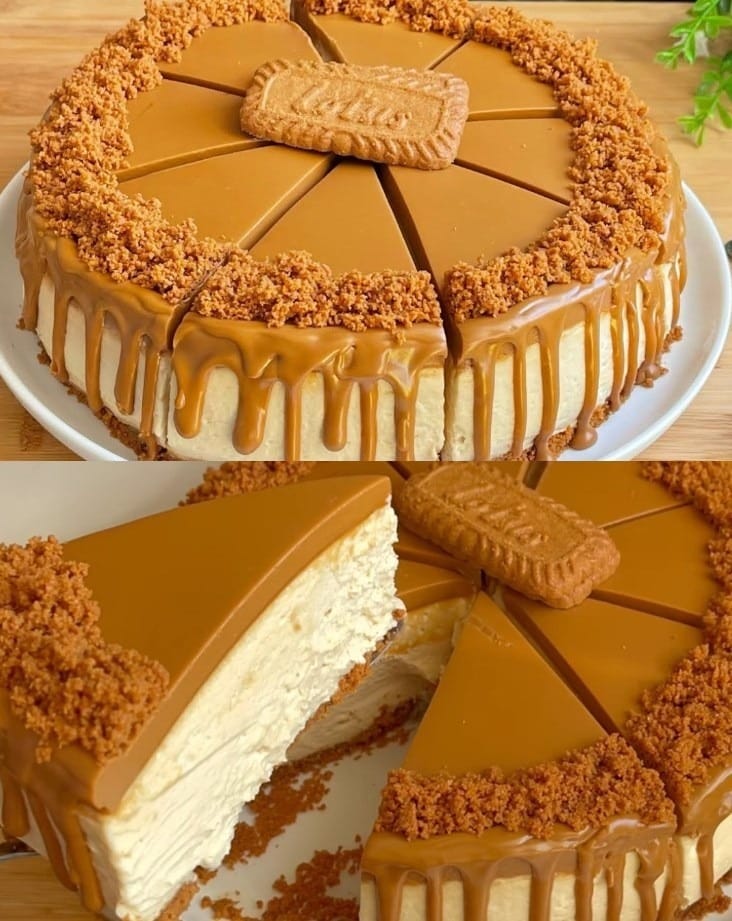
- Add the Toppings:
- Before serving, garnish the top of the cheesecake with additional crushed Biscoff cookies or arrange whole cookies around the edge for a decorative touch.
- Drizzle with slightly warmed Biscoff spread for extra flavor and a beautiful finish.
- Serve:
- Remove the cheesecake from the springform pan (if using) by carefully running a knife around the edges and then opening the clasp.
- Slice and serve chilled.
Tips for Perfection:
- Chill the Crust: Ensure the crust is well-chilled before adding the filling to prevent it from mixing with the crumbs.
- Smooth Filling: Make sure the cream cheese is at room temperature before beating it; this helps avoid lumps in your cheesecake filling.
- Stiff Peaks: Whip the heavy cream to stiff peaks before folding it into the cream cheese mixture to ensure the filling sets properly and holds its shape.
This No-Bake Biscoff Cheesecake is a delightful, creamy dessert that’s sure to impress with its rich flavor and elegant appearance. Enjoy this luscious treat without the need for an oven!