- Activate the yeast. In a large mixing bowl, combine the warm water, sugar, and yeast. Stir gently and let it sit for about 5 minutes until the mixture becomes frothy and bubbly, indicating that the yeast is activated.
- Add the dry ingredients. To the yeast mixture, add the flour, salt, rosemary, and minced garlic. Stir the mixture using a wooden spoon or spatula until it forms a sticky dough. Don’t worry about over-mixing; it’s meant to be a rough dough.
- Add olive oil. Drizzle the olive oil into the dough and mix it in until it’s well incorporated. The dough should remain sticky and slightly tacky to the touch.
Stage 2: Rising the Dough
- Let the dough rise. Cover the bowl with a clean kitchen towel or plastic wrap, and let the dough rise in a warm place for 12-18 hours. The dough should double in size and become slightly bubbly.
- Check the dough. After the rising period, the dough should be very soft and slightly sticky, with air bubbles visible inside.
Stage 3: Shaping the Dough
- Preheat the oven. Preheat your oven to 450°F (230°C). If you’re using a Dutch oven or cast-iron pot, place it in the oven while it heats up to allow it to get hot.
- Shape the dough. On a lightly floured surface, gently scrape the dough out of the bowl and fold it over a couple of times to shape it into a rough ball. Be careful not to deflate it too much; the dough should remain airy.
- Let the dough rest. Let the shaped dough rest for about 30 minutes to allow it to rise a little more while the oven heats up.
Stage 4: Baking the Bread
- Prepare for baking. If you’re using a Dutch oven or cast-iron pot, lightly dust it with cornmeal to prevent sticking. Place the dough inside the preheated pot, and cover it with a lid or foil. If not using a pot, you can bake the bread on a parchment-lined baking sheet.
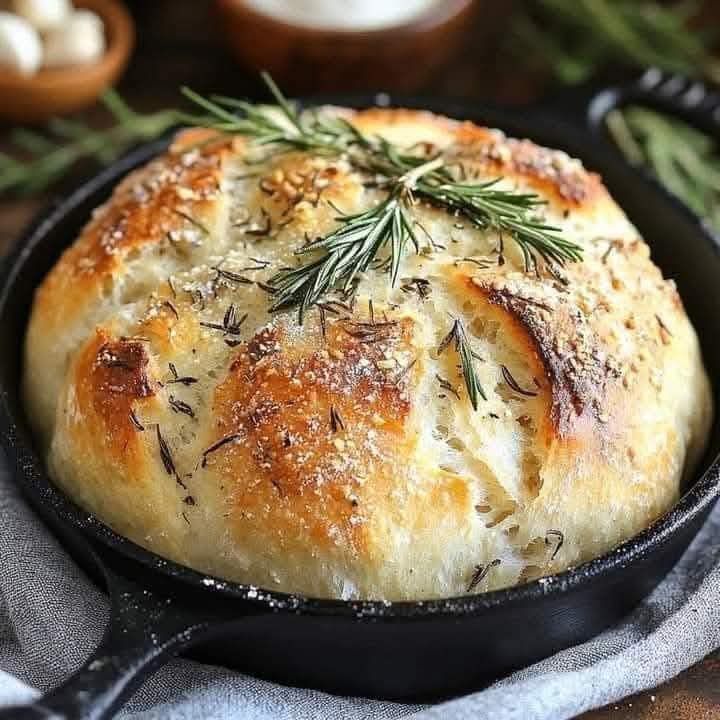
- Bake the bread. Place the dough in the oven and bake for 25-30 minutes, covered. After 25 minutes, uncover the bread and bake for an additional 10-15 minutes, or until the bread is golden brown and sounds hollow when tapped on the bottom.
- Optional garlic oil topping. For an extra burst of garlic and rosemary flavor, mix 1 tablespoon of olive oil with 1 clove of minced garlic and a pinch of salt. After the bread is done baking, drizzle this garlic oil over the hot bread for added flavor.
Stage 5: Cooling and Serving
- Cool the bread. Let the bread cool on a wire rack for at least 15-20 minutes before slicing to allow the crumb to set.
- Serve. Slice the bread and serve it with butter, cheese, or as an accompaniment to soups, salads, or pasta dishes. It also makes an excellent sandwich bread!
Tips for the Best Rustic No-Knead Rosemary Garlic Bread:
- Use fresh rosemary for the best flavor. Fresh rosemary imparts a fragrant and savory taste that pairs beautifully with garlic.
- Adjust garlic to taste. If you prefer a more intense garlic flavor, you can increase the amount of garlic in the dough or drizzle extra garlic-infused oil on top after baking.
- Add a little more flour if the dough is too sticky. The dough should be sticky, but if it’s too wet to handle, add a bit more flour, a tablespoon at a time, until it’s manageable.
- Let the dough rise for a long time. The long fermentation period gives the bread its rich flavor and texture, so don’t rush the process.
Final Thoughts:
This Rustic No-Knead Rosemary Garlic Bread is an incredibly easy yet flavorful bread recipe that requires minimal effort and delivers maximum flavor. The fragrant rosemary and garlic, combined with the soft, airy texture and crisp crust, make this bread an ideal accompaniment to any meal or a delicious snack on its own. Enjoy the warm, comforting goodness of homemade bread!
