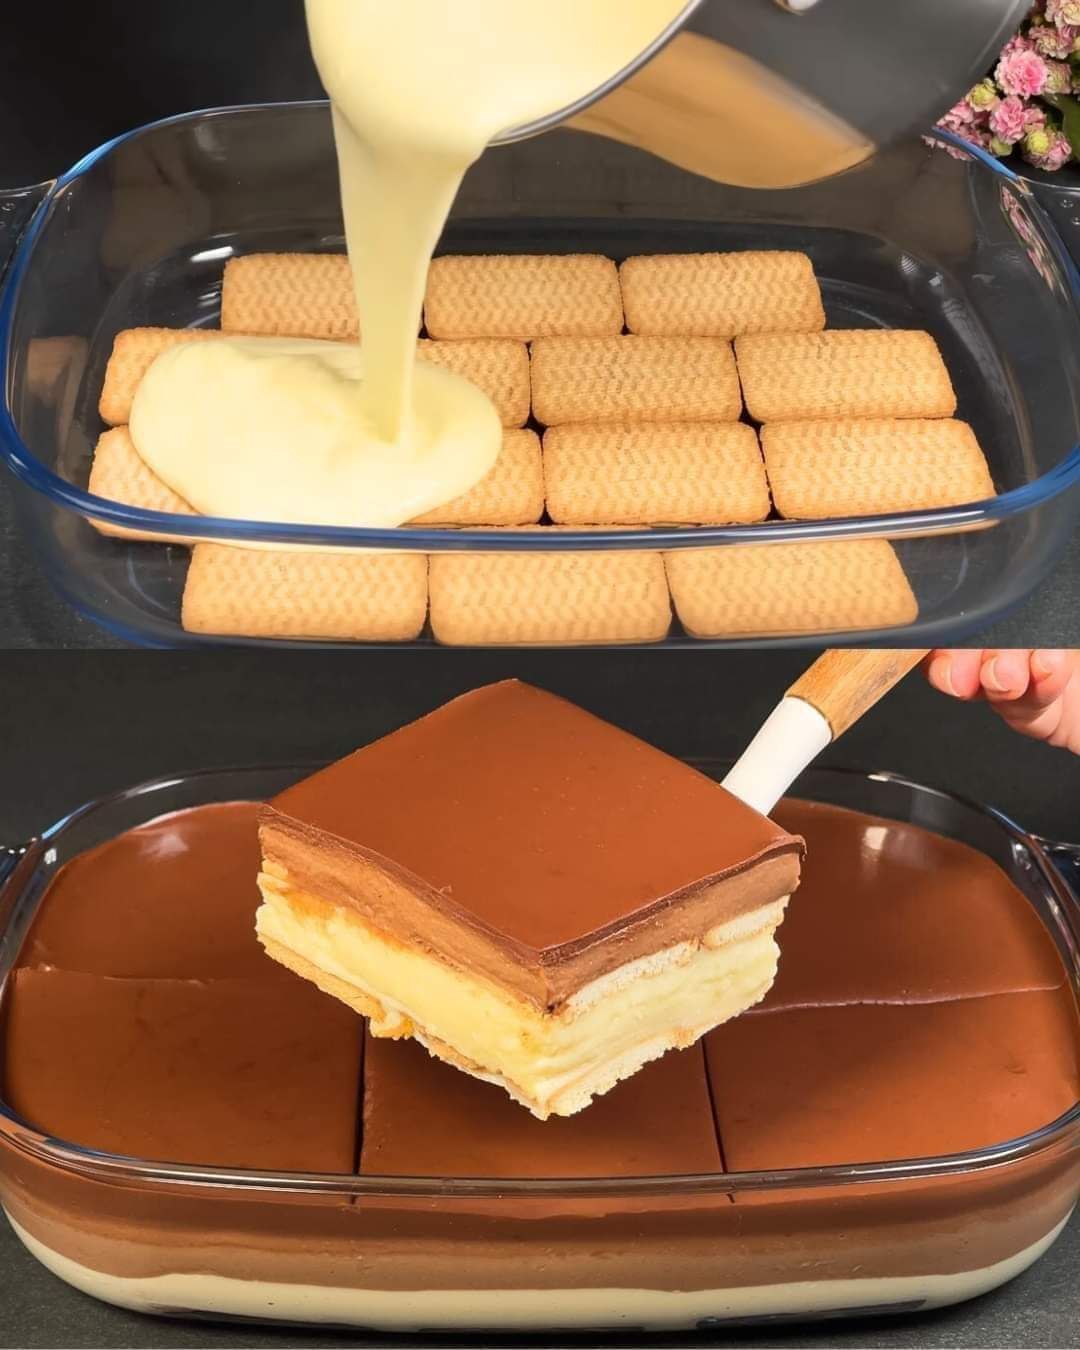
The crust provides a deliciously crunchy base to contrast the smooth chocolate custard filling.
- Crush the Cookies
Place chocolate wafer cookies or graham crackers in a food processor and pulse until you get fine crumbs. Alternatively, you can place them in a zip-top bag and crush them with a rolling pin. - Combine Crumbs, Sugar, and Butter
In a mixing bowl, combine the cookie crumbs with the granulated sugar and melted butter. Stir until the crumbs are evenly coated and resemble wet sand. - Press into the Pan
Press the crust mixture firmly into the bottom of a 9×9-inch baking dish or springform pan, creating an even layer. Place the pan in the refrigerator to set while you make the custard filling.
Step 2: Making the Chocolate Custard Layer
This creamy chocolate layer is the heart of this dessert, adding a rich, silky texture and deep chocolate flavor.
- Whisk Dry Ingredients
In a medium saucepan, whisk together the sugar and cornstarch until well-mixed. This helps prevent lumps from forming in your custard. - Add Milk and Heat
Gradually pour in the milk, whisking constantly to combine. Place the saucepan over medium heat and cook, stirring frequently, until the mixture begins to thicken and bubble, about 5-7 minutes. - Temper the Egg Yolks
In a separate bowl, whisk the egg yolks. To prevent curdling, slowly add a small amount of the hot milk mixture to the yolks, whisking constantly. This gradually raises the temperature of the yolks without scrambling them. - Add Yolks to the Custard
Pour the tempered yolks back into the saucepan and continue to cook, stirring constantly, until the mixture is thick enough to coat the back of a spoon, about 2-3 minutes. - Add Chocolate and Vanilla
Remove from heat and immediately add the chocolate chips (or chopped chocolate) and vanilla extract. Stir until the chocolate is fully melted and the custard is smooth and velvety. - Cool the Custard
Allow the custard to cool slightly for about 10 minutes, then pour it over the chilled crust. Use a spatula to spread it evenly. Cover with plastic wrap, pressing it directly onto the surface of the custard to prevent a skin from forming, and refrigerate for at least 3 hours or until fully set.
Step 3: Making the Whipped Cream Topping
Once the chocolate custard layer is set, it’s time to add a fluffy whipped cream topping to bring balance to the dessert.
- Chill the Bowl and Whisk
For the best results, chill your mixing bowl and whisk in the freezer for about 10 minutes before making the whipped cream. - Beat the Cream and Sugar
Add the chilled heavy cream, powdered sugar, and vanilla extract to the mixing bowl. Beat on medium-high speed until soft peaks form, usually 2-3 minutes. Be careful not to overbeat, as you want the whipped cream to be soft and fluffy, not grainy. - Spread Over Custard
Once whipped, gently spread the whipped cream over the chilled chocolate custard layer, creating an even layer. - Garnish (Optional)
For a decorative touch, add chocolate shavings or a dusting of cocoa powder over the whipped cream.
Step 4: Serving and Storing Your Chocolate Custard Deligh
- Chill Before Serving
For the best texture, chill the dessert for an additional 30 minutes after adding the whipped cream layer to ensure everything is perfectly set. - Slice and Serve
Use a sharp knife to slice into squares (or wedges if using a round pan) and serve immediately for the freshest flavor. - Storage Tips
Cover any leftovers with plastic wrap and store in the refrigerator for up to 3 days. The whipped cream will hold its texture best if enjoyed within the first 1-2 days.
Tips for Perfect Chocolate Custard
- Use Quality Chocolate
The better the chocolate, the richer and more decadent the custard. Semi-sweet or dark chocolate with around 60-70% cocoa content works beautifully. - Control the Heat
Custard is sensitive to heat, so keep it on medium to prevent curdling. Constant stirring helps the custard thicken evenly. - Chill Fully for the Best Layers
This dessert requires patience to set properly in the refrigerator, but the creamy layers and distinct textures are worth the wait.
Enjoying Your No-Bake Chocolate Custard Delight
Each bite of this No-Bake Chocolate Custard Delight is pure indulgence—a mix of rich chocolate, cool custard, and airy whipped cream that will leave your taste buds dancing. This dessert is ideal for potlucks, family dinners, or any occasion when you want to impress without turning on the oven. So dive in and enjoy every delicious, creamy, chocolatey layer!
Let this step-by-step guide inspire your readers to try their hand at this simple, satisfying dessert. The final result is as much a feast for the eyes as it is for the taste buds!
