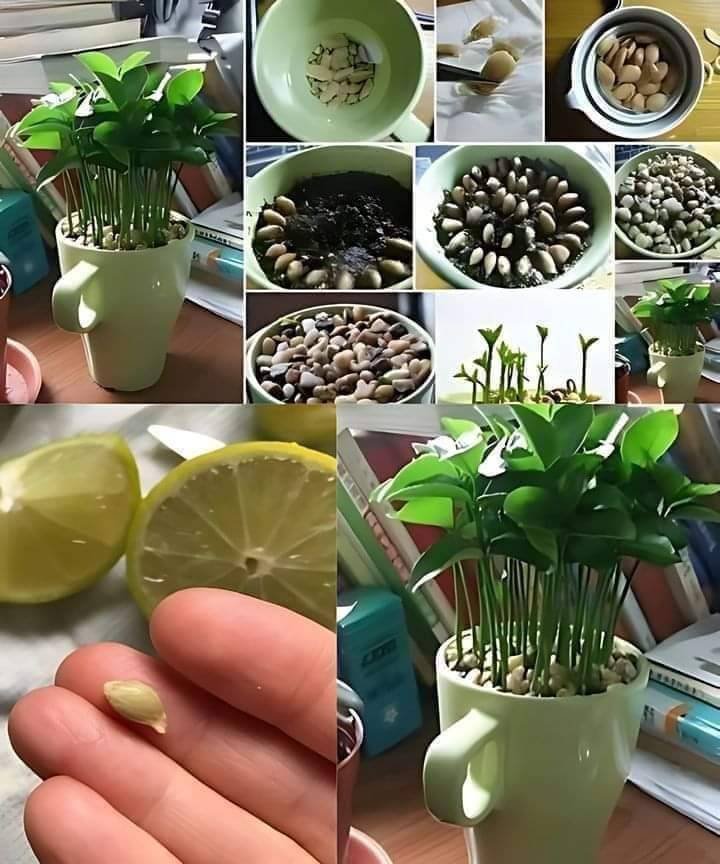
1. Prepare the Lemon Seeds
- Extract Seeds: Cut open an organic lemon and carefully extract the seeds.
- Clean Seeds: Rinse the seeds under water to remove any pulp or sticky residue, which can inhibit germination.
- Peel the Seeds: (Optional but helpful) Some gardeners carefully remove the outer shell of the seed to speed up germination. Use your nails or a small knife to gently peel the seed.
2. Plant the Seeds
- Fill the Cup with Soil: Add potting soil to your cup or small pot, leaving about 1 inch of space from the top.
- Plant the Seeds: Plant the seeds about 1/2 inch deep in the soil. You can plant multiple seeds to increase the chances of germination.
- Lightly Water: Use the spray bottle to lightly mist the soil until it’s moist but not soggy.
3. Create a Mini Greenhouse
- Cover the Cup: Cover the top of the cup with plastic wrap or a clear plastic bag to create a greenhouse effect, which helps retain moisture and warmth for the seeds to germinate.
- Make Small Holes: Poke a few small holes in the plastic to allow some airflow.
4. Place in a Sunny Spot
- Find a Bright Location: Place the cup in a warm, sunny spot, like a windowsill, where it will receive indirect sunlight for most of the day.
5. Care and Maintenance
- Watering: Keep the soil moist by misting it with water every couple of days. Be careful not to overwater, as lemon seeds can rot if the soil is too wet.
- Remove the Plastic Wrap: Once the seedlings sprout (usually in 1-3 weeks), remove the plastic wrap to allow the plant to grow in normal conditions.
6. Transplanting (Optional)
- Replant in a Larger Pot: If your lemon seedling grows big enough and you want it to thrive, you may want to transplant it into a larger pot after a few months.
Conclusion:
Growing a lemon tree in a cup is a simple way to enjoy the refreshing scent of citrus in your home. With just a few materials and some sunlight, you can start growing your own lemon plant, which will not only beautify your space but also naturally aromatize the air!
