Step 1: Prepare the Dough
- Activate the Yeast:
- In a small bowl, mix the warm water with the sugar. Sprinkle the yeast over the water and let it sit for about 5-10 minutes until it becomes frothy. This indicates that the yeast is active.
- Mix the Dry Ingredients:
- In a large mixing bowl, combine the flour and salt.
- Combine the Ingredients:
- Make a well in the center of the flour mixture and pour in the yeast mixture and olive oil. Mix until a dough forms.
Step 2: Knead the Dough
- Knead the Dough:
- Turn the dough out onto a lightly floured surface. Knead for about 8-10 minutes until the dough is smooth and elastic. If the dough is too sticky, add a little more flour, one tablespoon at a time.
Step 3: Let the Dough Rise
- First Rise:
- Place the dough in a lightly greased bowl, cover it with a damp cloth or plastic wrap, and let it rise in a warm place for about 1-1.5 hours, or until it has doubled in size.
Step 4: Shape the Dough
- Shape the Dough:
- Once the dough has risen, punch it down to release the air. Turn it out onto a floured surface and shape it into a loaf or into smaller rolls, depending on your preference.
Step 5: Second Rise
- Second Rise:
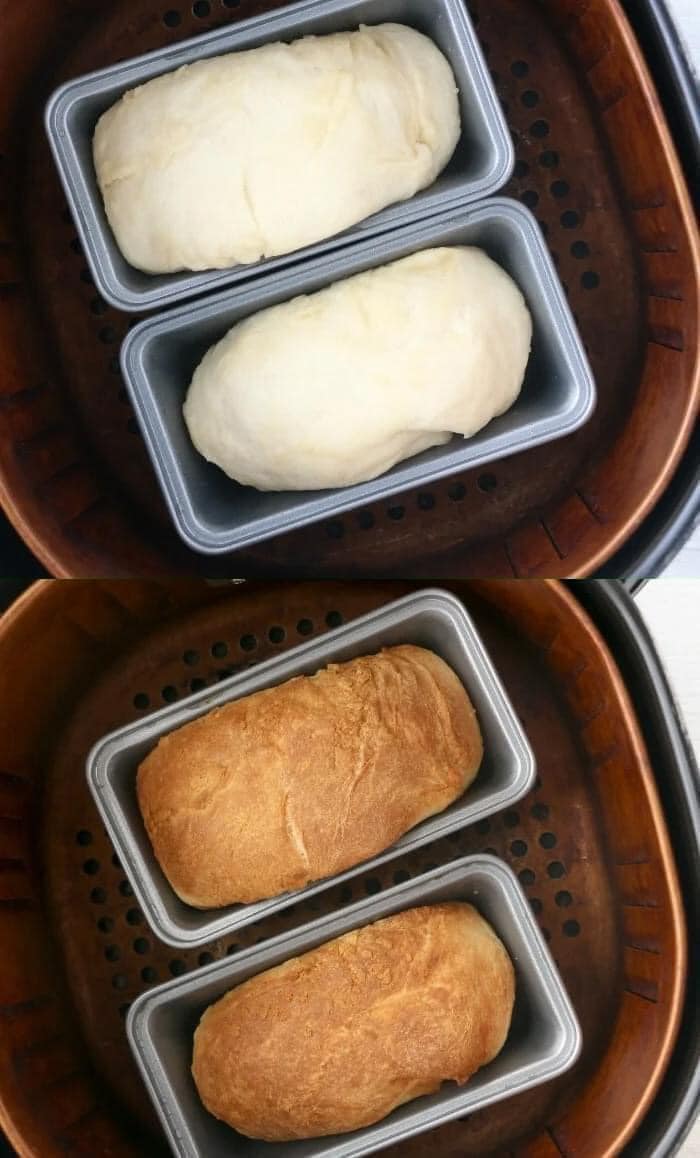
- Place the shaped dough into a greased air fryer basket or a greased baking pan that fits your air fryer. Cover it with a damp cloth and let it rise for another 30 minutes.
Step 6: Preheat the Air Fryer
- Preheat the Air Fryer:
- Preheat your air fryer to 350°F (175°C) for about 5 minutes.
Step 7: Air Fry the Bread
- Cook the Bread:
- Place the dough in the preheated air fryer. Air fry at 350°F (175°C) for 20-25 minutes. Check the bread halfway through; if the top is browning too quickly, cover it with aluminum foil to prevent burning.
- Check for Doneness:
- The bread is done when it has a golden-brown crust and sounds hollow when tapped on the bottom. An instant-read thermometer inserted into the center should read at least 190°F (88°C).
Step 8: Cool and Serve
- Cool the Bread:
- Remove the bread from the air fryer and let it cool on a wire rack for at least 15 minutes before slicing. This helps to set the texture and makes slicing easier.
- Brush with Butter:
- Optional: Brush the top of the bread with melted butter for a soft, flavorful crust.
Tips for Perfect Air Fryer Bread
- Consistency: The dough should be slightly sticky but manageable. Avoid adding too much flour as it can make the bread dense.
- Rising: Ensure the dough rises in a warm, draft-free environment. If your kitchen is cold, you can place the bowl in a slightly warm oven (turned off).
- Checking Doneness: If you don’t have a thermometer, use the tap test. The bread should sound hollow when tapped on the bottom.
- Storage: Store leftover bread in an airtight container at room temperature for up to 3 days. For longer storage, freeze the bread and thaw it when needed.
Conclusion
Homemade Air Fryer Bread is a wonderful way to enjoy freshly baked bread with minimal effort. The air fryer not only speeds up the baking process but also ensures a perfectly crisp crust and soft interior. Whether you’re a seasoned baker or a novice, this recipe is straightforward and rewarding. Enjoy the delicious aroma and taste of homemade bread, perfect for sandwiches, toast, or simply slathered with butter!
