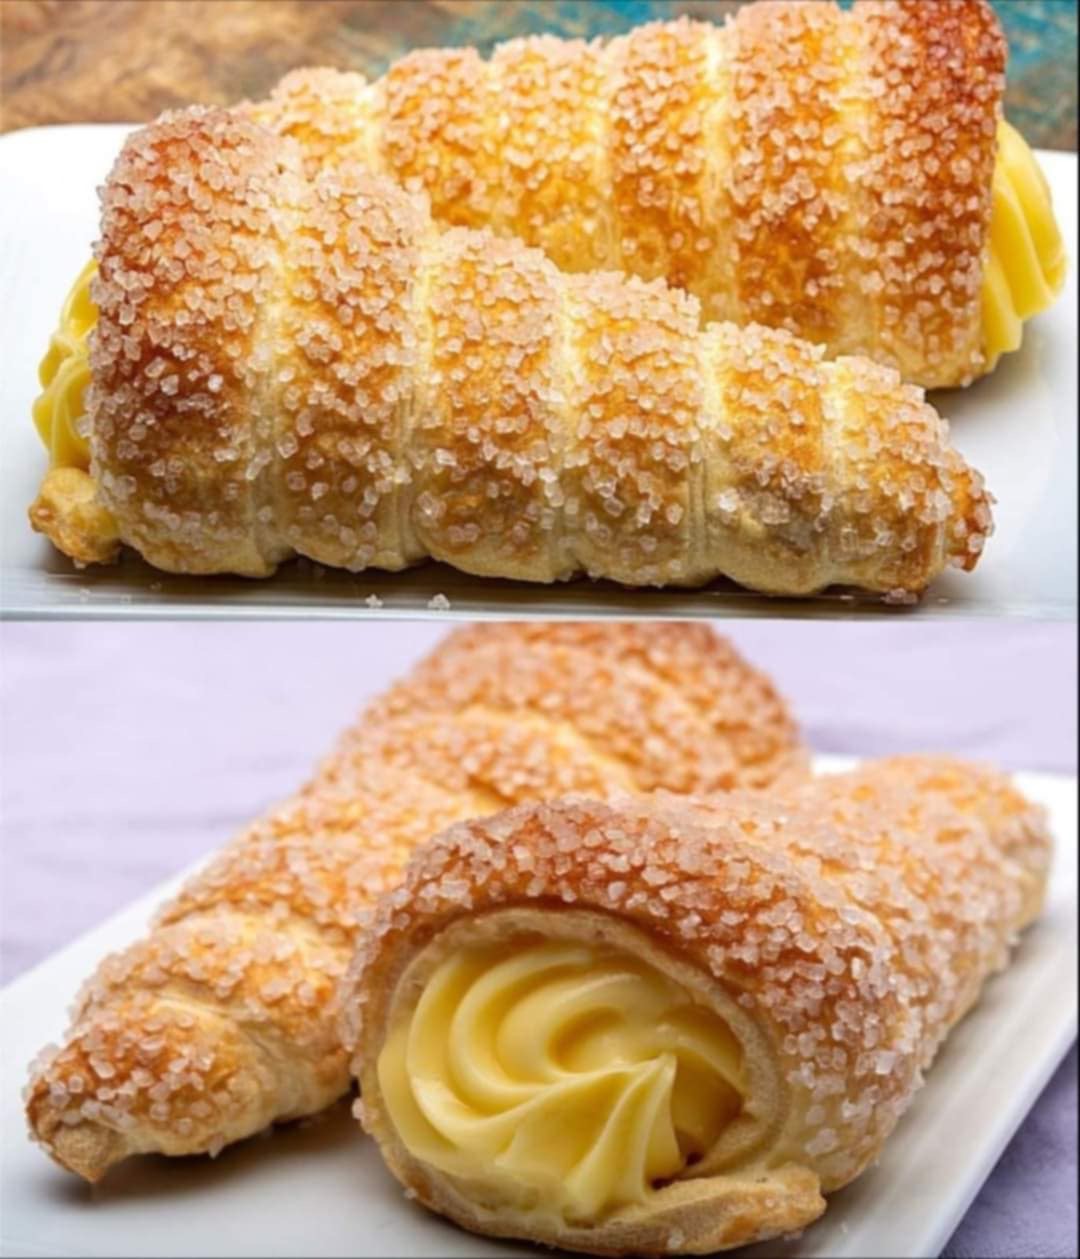
1. Prepare the Pastry Shells:
Start by creating the light and crispy pastry cones that are the hallmark of Cannoncini. You’ll need metal cream horn molds to shape the pastry, which can easily be found in baking stores or online.
- Preheat your oven to 375°F (190°C) and line a baking sheet with parchment paper.
- Lightly flour your work surface and roll out the puff pastry sheet to about ⅛ inch thickness.
- Using a pizza cutter or sharp knife, slice the pastry into long strips, approximately ¾ inch wide.
- Starting at the narrow end of each cream horn mold, wrap one strip of puff pastry around the mold, slightly overlapping as you go up to prevent any gaps. Make sure not to wrap too tightly, as the dough will puff up as it bakes.
Pro Tip: Wrapping with slight overlap ensures that your pastry horns will hold their shape and not fall apart during baking.
2. Add the Egg Wash and Bake:
- In a small bowl, whisk together the egg and water to create an egg wash.
- Brush each wrapped pastry horn lightly with the egg wash, ensuring even coverage for a shiny, golden finish.
- Sprinkle the granulated sugar over the pastry horns for added sweetness and texture.
- Place the pastry-wrapped molds on the prepared baking sheet and bake for 15-18 minutes, or until they are golden brown and crisp.
- Remove from the oven and allow the pastry horns to cool slightly before carefully sliding them off the molds. Let them cool completely on a wire rack.
3. Make the Vanilla Cream Filling:
While your pastry horns are cooling, it’s time to prepare the luxurious cream filling.
- In a medium saucepan, heat the milk and heavy cream over medium heat until it begins to simmer. Do not let it boil. Remove from heat.
- In a separate bowl, whisk the egg yolks, sugar, and cornstarch together until the mixture becomes pale and smooth.
- Slowly pour the warm milk mixture into the egg mixture, whisking constantly to temper the eggs and avoid curdling.
- Return the mixture to the saucepan and cook over medium heat, whisking continuously until the mixture thickens to a custard-like consistency, about 5-7 minutes.
- Remove from heat and whisk in the butter and vanilla extract until smooth.
- Transfer the cream to a bowl and cover with plastic wrap directly on the surface to prevent a skin from forming. Allow it to cool to room temperature.
Pro Tip: The custard needs to be thick enough to hold its shape when piped into the pastry cones but still silky and smooth.
4. Fill the Pastry Horns:
Once both the pastry horns and vanilla cream are fully cooled, it’s time to assemble your cannoncini.
- Transfer the vanilla cream into a piping bag fitted with a star or round tip.
- Gently pipe the cream into each pastry horn, filling it from end to end for a satisfying, creamy bite in every mouthful.
5. Decorate and Serve:
For a classic touch, dust the tops of your filled Cannoncini with powdered sugar. If you want to take it up a notch, you can also:
- Drizzle with melted chocolate or dip the ends into chocolate for an extra indulgent treat.
- Roll the edges in crushed nuts (like pistachios or almonds) for a crunchy contrast to the creamy filling.
Why This Recipe Stands Out:
This Cream Cannoncini recipe is a delightful combination of textures and flavors—crisp, buttery pastry balanced by a light, smooth vanilla filling. Each bite feels luxurious, yet the process to make them is surprisingly approachable.
By mastering the steps in this recipe, you’ll have a go-to dessert that is sure to impress at any gathering, whether it’s an elegant dinner party or a casual afternoon treat. Plus, the recipe offers endless possibilities for customization. You can play with different fillings, like chocolate or lemon curd, or even flavor the cream with a hint of coffee or almond extract for variety.
Baking Tips for Perfect Cannoncini Every Time:
- Keep the Puff Pastry Cold: Whether using store-bought or homemade, cold puff pastry ensures that it puffs up properly and turns golden brown without becoming greasy.
- Don’t Overfill: While it’s tempting to pack in as much cream as possible, overfilling can cause the pastry to become soggy. Fill just before serving for the best texture.
- Timing is Key: Assemble the Cannoncini just before serving to preserve the crispness of the pastry and the freshness of the cream.
Make It Your Own:
- Flavor Variations: Add a spoonful of Nutella, lemon curd, or jam to the cream filling for an added surprise inside each pastry horn.
- Savory Option: Swap the sweet cream filling for a savory one like ricotta and herbs or cream cheese with smoked salmon for a unique appetizer version.
Conclusion:
These Cream Cannoncini are the epitome of indulgence, combining flaky pastry with a dreamy, creamy filling that makes each bite a moment of pure bliss. Once you’ve mastered this recipe, you’ll find that it’s not just the taste but the process itself that’s so enjoyable—watching the dough puff up, preparing the rich cream, and finally, assembling these elegant little treats.
Whether you’re a seasoned baker or just starting out, this recipe is sure to become a staple in your dessert repertoire. Treat yourself and your loved ones to the ultimate Italian pastry experience, and enjoy the compliments that will surely follow!
