Step 1: Baking the Coconut Cake
- Preheat the Oven: Preheat your oven to 350°F (175°C). Grease and line two 9-inch round cake pans with parchment paper.
- Mix the Dry Ingredients: In a medium bowl, whisk together the flour, baking powder, baking soda, and salt.
- Cream the Butter and Sugar: In a large mixing bowl, beat the butter and sugar together until light and fluffy, about 3-4 minutes.
- Add the Eggs and Vanilla: Add the eggs one at a time, beating well after each addition. Mix in the vanilla extract.
- Alternate Adding Wet and Dry Ingredients: Gradually add the flour mixture in three parts, alternating with the coconut milk and sour cream, beginning and ending with the flour mixture. Mix until just combined.
- Fold in the Shredded Coconut: Gently fold in the shredded coconut.
- Bake the Cakes: Divide the batter evenly between the prepared pans. Smooth the tops and bake for 25-30 minutes, or until a toothpick inserted into the center comes out clean.
- Cool the Cakes: Let the cakes cool in the pans for 10 minutes, then turn them out onto cooling racks to cool completely.
Step 2: Preparing the Coconut Cream Frosting
- Beat the Butter: In a large bowl, beat the butter until creamy and smooth.
- Add the Powdered Sugar: Gradually add the powdered sugar, one cup at a time, mixing on low speed until combined.
- Mix in the Coconut Milk and Cream of Coconut: Add the coconut milk, vanilla extract, and cream of coconut, and beat until the frosting is smooth and fluffy.
Step 3: Assembling and Decorating the Cake
- Level the Cakes: If needed, level the tops of the cooled cakes with a serrated knife to ensure even layers.
- Frost the First Layer: Place one cake layer on a cake stand or serving plate. Spread a generous amount of frosting over the top.
- Add the Second Layer: Place the second cake layer on top and apply a thin crumb coat of frosting to seal in any loose crumbs. Refrigerate for 20 minutes.
- Final Frosting: Apply the remaining frosting evenly over the top and sides of the cake.
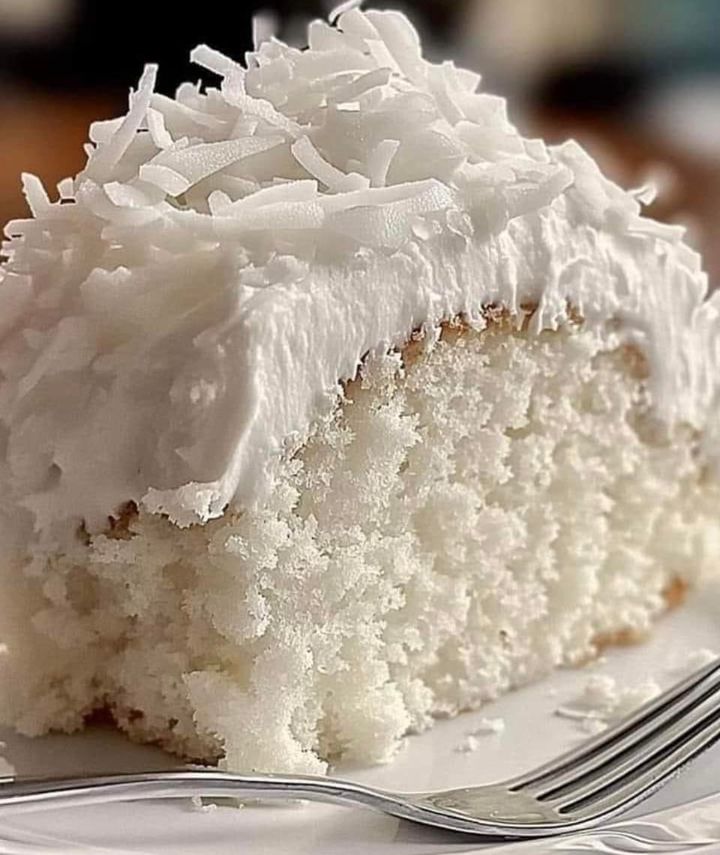
- Decorate with Shredded Coconut: Gently press shredded coconut into the sides and sprinkle it on top for a beautiful finish.
5. Serving Suggestions
- Toasted Coconut: For extra flavor and texture, toast some of the shredded coconut before sprinkling it on top.
- Fresh Berries: Add a burst of color by garnishing with fresh berries like raspberries or blueberries.
- Tropical Twist: Serve with a side of pineapple slices or a drizzle of passion fruit syrup.
6. Tips for a Perfect Coconut Cake
- Room Temperature Ingredients: Make sure your butter, eggs, and coconut milk are at room temperature for a smoother batter.
- Don’t Overmix: Overmixing the batter can lead to a dense cake. Mix just until the ingredients are combined.
- Even Layers: For perfectly even cake layers, weigh the batter to ensure equal amounts in each pan.
7. Variations and Customizations
- Lemon Coconut Cake: Add lemon zest and juice to the batter for a citrusy twist.
- Chocolate Coconut Cake: Mix in cocoa powder or chocolate chips for a richer flavor.
- Pineapple Filling: Add a layer of pineapple filling between the cake layers for a tropical flavor boost.
8. FAQs and Storage Tips
- How Long Does It Last? The cake can be stored in an airtight container at room temperature for up to 2 days or in the fridge for up to 5 days.
- Can I Freeze the Cake? Yes! Wrap the unfrosted cake layers tightly in plastic wrap and freeze for up to 3 months. Thaw before frosting and serving.
- Can I Use Coconut Cream Instead of Coconut Milk? Yes, but it will make the cake even richer. Adjust the amount of liquid accordingly if using coconut cream.
9. Conclusion: A Sweet Slice of Tropical Heaven
This Creamy Coconut Cake is the perfect treat for coconut lovers. With its moist, flavorful layers and smooth coconut frosting, it’s a delicious cake that’s both comforting and elegant. Serve it at your next gathering, and watch it disappear slice by slice! Enjoy the tropical vibes this cake brings with every bite.