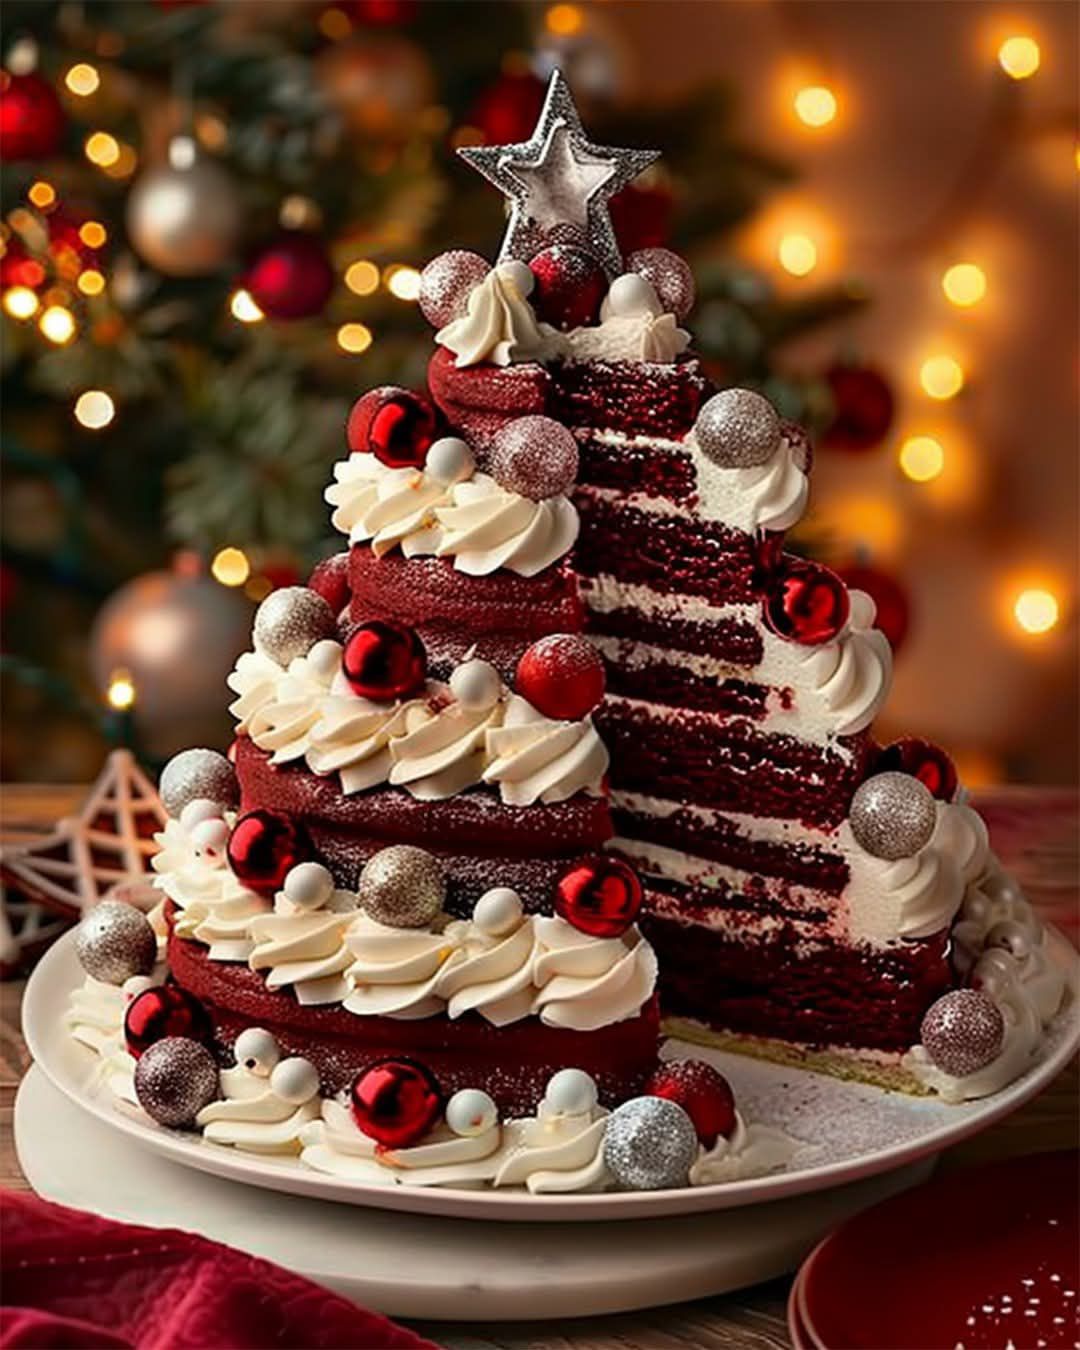
Step 1: Preheat and Prepare
- Preheat your oven to 350°F (175°C).
- Grease and flour two 9-inch round cake pans. Line the bottoms with parchment paper for easy removal.
Step 2: Mix the Dry Ingredients
In a large bowl, whisk together the flour, sugar, baking soda, salt, and cocoa powder. Set aside.
Step 3: Combine the Wet Ingredients
- In another bowl, beat the eggs, oil, buttermilk, food coloring, vanilla extract, and vinegar until smooth.
- Gradually add the wet mixture to the dry ingredients, mixing until just combined. Do not overmix.
Step 4: Bake the Cake
- Divide the batter evenly between the prepared pans.
- Bake for 30-35 minutes, or until a toothpick inserted into the center comes out clean.
- Let the cakes cool in the pans for 10 minutes, then transfer them to a wire rack to cool completely.
Step 5: Make the Frosting
- In a large bowl, beat the softened butter and cream cheese until smooth and fluffy.
- Gradually add the powdered sugar, one cup at a time, beating well after each addition.
- Mix in the vanilla extract.
- Remove a portion of the frosting and tint it green with food coloring for the tree decoration. Leave the rest white for layering.
Step 6: Assemble the Tree Cake
- Shape the Cake:
- Using a sharp knife, cut each round cake into a triangle (tree shape). Save the scraps for a snack or crumble them for decoration.
- Place one triangle on a serving platter as the base layer.
- Frost the Layers:
- Spread an even layer of white cream cheese frosting over the first cake layer.
- Add the second triangle on top and apply a crumb coat (a thin layer of frosting to seal in crumbs). Chill the cake for 30 minutes.
- Decorate the Tree:
- Frost the entire cake with the green-tinted frosting, smoothing it to resemble a tree.
- Use a piping bag fitted with a star tip to add texture and branches.
Step 7: Add Festive Decorations
- Sprinkle star-shaped decorations and edible glitter across the tree.
- Attach sugar pearls or mini candy canes to mimic ornaments.
- Add a golden star or edible topper to the tip of the tree.
Serving Suggestions
Slice and serve with a warm cup of cocoa or spiced cider for a cozy holiday dessert experience.
Tips for Succes
- Cake Crumbs: Use leftover cake scraps to make red velvet cake pops or sprinkle them over ice cream.
- Stability: Chill the cake between frosting layers to make decorating easier.
- Tree Variation: Create multiple smaller trees by using a stencil and cutting smaller triangles from the baked cakes.
Conclusion
The Red Velvet Tree Cake is more than just a dessert—it’s a holiday masterpiece. Perfect for family gatherings or festive parties, this cake combines delicious flavor with stunning visuals. Take your time with the decorations, and you’ll create a centerpiece that’s as delightful to look at as it is to eat.
Let the holiday baking magic begin!
